Getting Started
Hardware Requirements
Software Requirements
DNS
TLS
Storage
LDAP
Reference Topology
Deploying
Welcome
Media
DNS
User Directory
Users Preview
Import
Administration
Users
Groups
Group Chats
Policies
Upgrades
Backups
Getting Started
This guide is intended for use by the individual(s) who will be responsible for deploying Trillian Server within their organization. It covers the basic hardware and software requirements for Trillian Server, explains some of the prerequisites for a successful deployment, and outlines a basic topology example to give deployers an idea of how Trillian Server will fit within their existing infrastructure.
Deploying a Trillian Server is like deploying an email or web server - you will be installing and configuring software on a machine whose purpose will be communicating with users within your internal network and users outside of it (mobile phones, roaming employee laptops, etc). Accordingly, decisions need to be made about how to facilitate access to the machine itself within the scope of your existing security policies. While we've strived to make the process as painless as possible, there are a few important steps to consider before you begin:
- Preparing the server hardware itself (or the virtual equivalent if using a VM) according to the specifications below.
- Opening the necessary ports on your firewall to reach the Trillian Server: 443 (for HTTPS), 3158 (for IMPP), and 5269 (for XMPP; optional).
- Preparing the necessary DNS records, which let Trillian clients find your server instead of ours.
- Obtaining or preparing a TLS certificate or deciding to use a self-signed certificate, which Trillian Server will generate for you.
- Deciding on using internal storage or Amazon S3 storage. All data sent to S3 is first encrypted locally using AES-256.
- Deciding on using a local user directory or one populated by Active Directory or OpenLDAP.
Hardware Requirements
Trillian Server requires 64-bit hardware. The specific hardware used can vary depending on the size of your deployment, but the following guidelines can be used for deployments below 5,000 users:
| Hardware component | Recommended |
|---|---|
| CPU | 64-bit processor, 2.0 GHz or higher, dual-core or higher |
| Memory | 8GB |
| Disk | Local storage with at least 72GB free on a 10,000 RPM+ drive. |
| Network | 1 network adapter, 1 Gbps or higher |
Software Requirements
Trillian Server requires a 64-bit version of Windows Server 2008 R2 or above. We recommend installing Trillian Server on a dedicated machine to avoid performance issues. Trillian Server listens on TCP ports 443 and 3158; if you deploy Trillian Server to a machine running other services, you must ensure these ports are available before installation. In addition, Trillian Server supports XMPP federation for optional server-to-server communication. If you choose to utilize XMPP federation, TCP port 5269 is also used.
DNS
To deploy Trillian Server, you must create DNS records that enable the discovery of your Trillian Server by Trillian clients. We recommend that the IM domain name you select for Trillian Server matches your organization's email domain name. For example, if your email address is smw@ceruleanstudios.com, configure Trillian Server to use the ceruleanstudios.com domain and publish the necessary DNS records there. There are three different service (SRV) records required and one A record (the "target" value below) required; for example, for the ceruleanstudios.com domain:
| _impp._tcp.ceruleanstudios.com | |
|---|---|
Service | _impp |
Protocol | _tcp |
Name | ceruleanstudios.com |
Priority | 10 |
Weight | 0 |
Port | 3158 |
Target | impp.ceruleanstudios.com |
| _impp-media._tcp.ceruleanstudios.com | |
|---|---|
Service | _impp-media |
Protocol | _tcp |
Name | ceruleanstudios.com |
Priority | 10 |
Weight | 0 |
Port | 443 |
Target | impp.ceruleanstudios.com |
| _impp-https._tcp.ceruleanstudios.com | |
|---|---|
Service | _impp-https |
Protocol | _tcp |
Name | ceruleanstudios.com |
Priority | 10 |
Weight | 0 |
Port | 443 |
Target | impp.ceruleanstudios.com |
You can use the same hostname for all three service records because they all point to the same machine. Remember that the fully-qualified domain name (FQDN) of the Trillian Server will later be used when obtaining a TLS certificate, so choose the name with that in mind. If your organization already owns a wildcard certificate for its domain, you can pick any names you want here or even three different names (such as impp.ceruleanstudios.com, impp-media.ceruleanstudios.com, etc). If you expect to have to purchase a certificate, remember that it will be bound to the FQDN you're publishing through DNS.
XMPP Federation
If you want your Trillian Server to be available to other XMPP-enabled servers for purposes of server-to-server federation, you need to publish an additional SRV record to let XMPP servers know how to reach your server. Note that we are re-using the same "target" value below, but you could decide to create a new A record "xmpp.ceruleanstudios.com" pointing to the same machine if you so desire. Feel free to skip this step entirely until you decide on utilizing federation.
| _xmpp-server._tcp.ceruleanstudios.com | |
|---|---|
Service | _xmpp-server |
Protocol | _tcp |
Name | ceruleanstudios.com |
Priority | 10 |
Weight | 0 |
Port | 5269 |
Target | impp.ceruleanstudios.com |
Split-Brain DNS
If your organization hosts DNS for your IM domain name both internally and externally, this is considered "split-brain" DNS. For example, this would mean that you run a DNS server for ceruleanstudios.com behind the firewall as well as outside it (hosted by you or a third-party ISP). Split-brain DNS environments allow you to configure the necessary SRV and A records internally to point to internal IP addresses (for example, 192.168.x.x) and externally to point to external, internet-routable IP addresses.
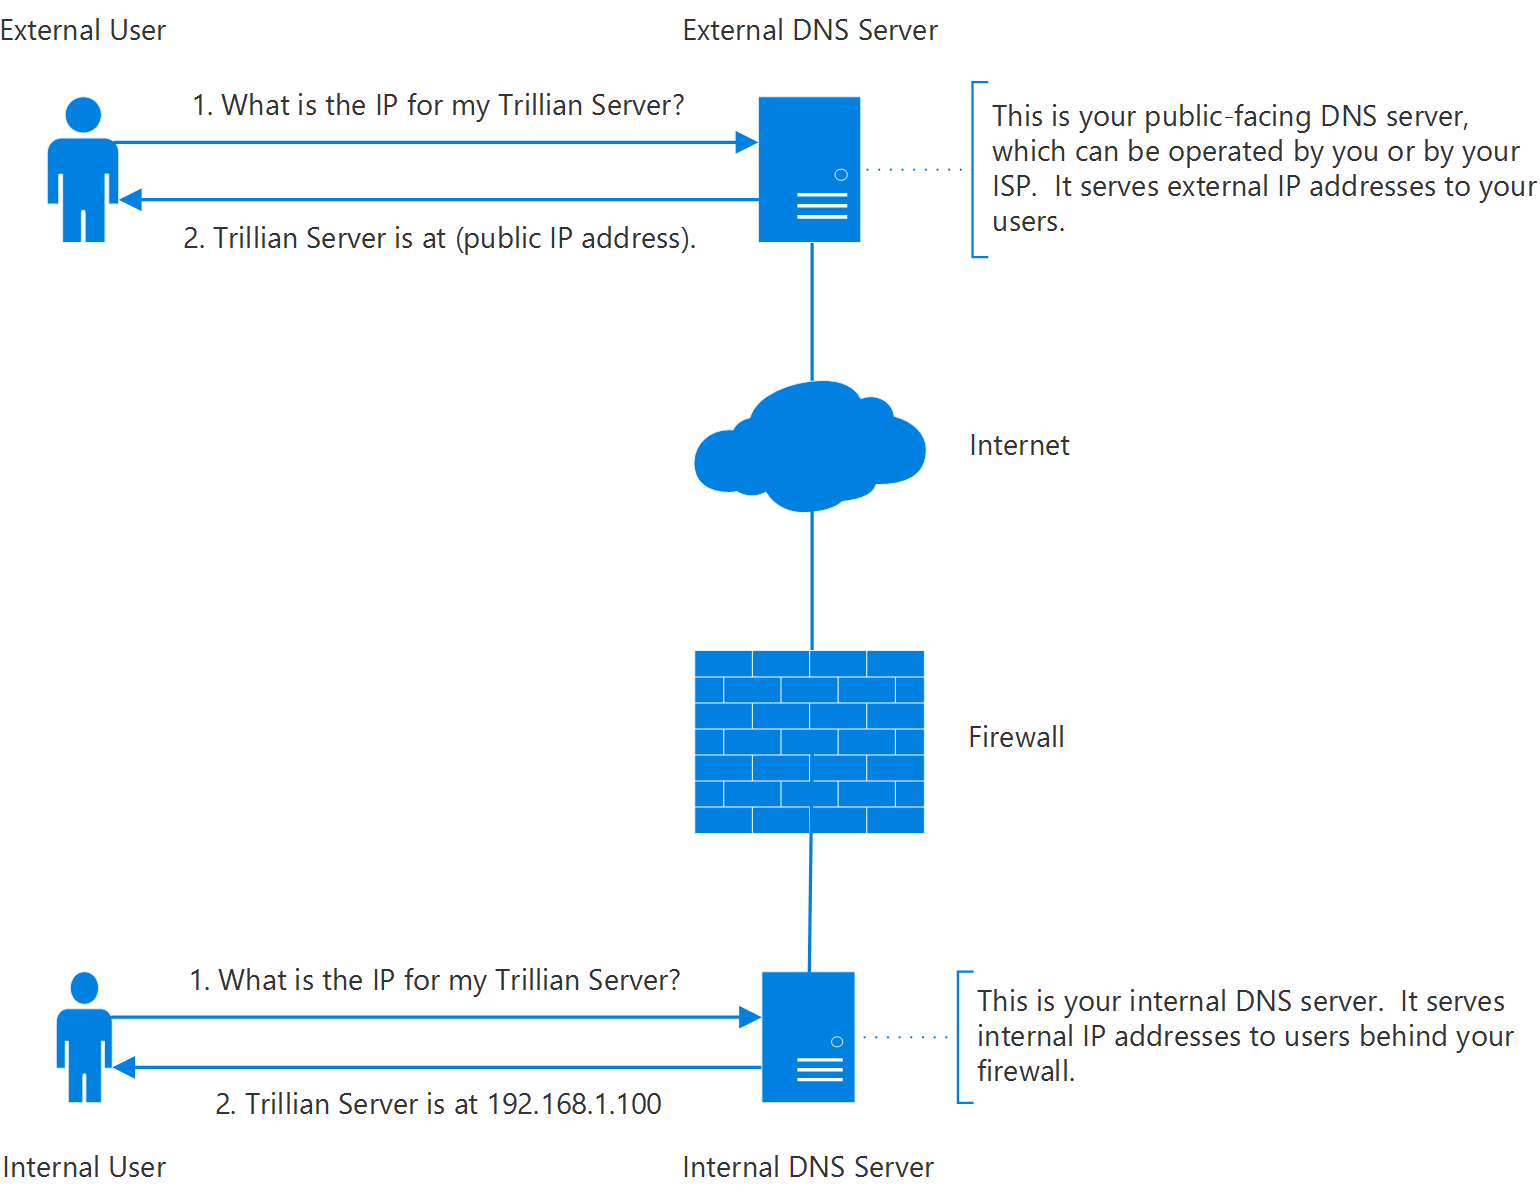
Pinpoint DNS
If your organization does not host DNS for your IM domain name internally, another option is to publish what is known as a "pinpoint" DNS zone specifically for the DNS records required by Trillian Server. Unfortunately, Microsoft's DNS manager doesn't support the creation of pinpoint zones through its user interface, but you can run the dnscmd tool from a command prompt to create the necessary zones. The perk of this solution is that you are emulating a true split-brain environment without actually having to host your DNS internally as well. For example, if your Trillian Server resides internally at 192.168.1.100, you would run the following commands to create the pinpoint zones and populate them with the necessary SRV and A records, replacing "ceruleanstudios.com" with your chosen IM domain name:
dnscmd . /zoneadd _impp._tcp.ceruleanstudios.com. /dsprimary
dnscmd . /zoneadd _impp-media._tcp.ceruleanstudios.com. /dsprimary
dnscmd . /zoneadd _impp-https._tcp.ceruleanstudios.com. /dsprimary
dnscmd . /zoneadd impp.ceruleanstudios.com. /dsprimary

dnscmd . /recordadd _impp._tcp.ceruleanstudios.com. @ SRV 10 0 3158 impp.ceruleanstudios.com.
dnscmd . /recordadd _impp-media._tcp.ceruleanstudios.com. @ SRV 10 0 443 impp.ceruleanstudios.com.
dnscmd . /recordadd _impp-https._tcp.ceruleanstudios.com. @ SRV 10 0 443 impp.ceruleanstudios.com.
dnscmd . /recordadd impp.ceruleanstudios.com. @ A 192.168.1.100
NAT Hairpinning
If your organization does not host DNS for your IM domain name internally and you'd prefer not to create pinpoint DNS zones, this normally means Trillian clients behind your firewall will receive an external IP address when attempting to locate your Trillian Server. If your NAT environment allows what is known as "hairpinning" - meaning a client machine at 192.168.1.200 can reach the Trillian Server at 192.168.1.100 by way of its external IP address 4.4.4.4 - then you only have to publish DNS records externally.
TLS
All connections to Trillian Server are encrypted with TLS. Accordingly, you will need to provide a TLS certificate that corresponds to your domain. The name on the TLS certificate must match the DNS name of the Trillian Server itself. Wildcard certificates are also supported. For example, if your SRV records point to an A record of "impp.ceruleanstudios.com", your TLS certificate should be for "*.ceruleanstudios.com" or "impp.ceruleanstudios.com". This is why, unless you have a wildcard certificate, it's useful (and cheaper) to assign the same FQDN to all three SRV records.
Storage
Trillian Server supports optional integration with Amazon's S3 cloud storage service. As your users will be sharing files, images, and growing their chat history logs over time, it can be desirable to avoid worrying about local disk space requirements and constantly maintaining local storage supply. If you choose to utilize S3, all data sent to Amazon is first locally encrypted using AES-256. The encryption key is generated with a cryptographically secure pseudorandom number generator and stored locally on your Trillian Server. In addition, all ciphertext is signed using HMAC-SHA-256 using a second key to ensure your data is not modified after it leaves your server. Making a secure backup of your encryption and signing keys is vitally important to ensuring your ability to recover data on S3 in the event of a catastrophic system crash!
| Encryption and signing keys are stored in the "trillianserver.conf" file, normally located in "C:\ProgramData\Trillian Server\config\". |
| Even if you use local storage, data is still encrypted due to the architecture of Trillian Server, so backups are still important! |
LDAP
Trillian Server supports optional integration with Active Directory or OpenLDAP for user import. In this mode, users will authenticate with their existing LDAP passwords and Trillian Server will not store passwords internally. This setup can be desirable to shield users from having to learn and maintain a new set of credentials.
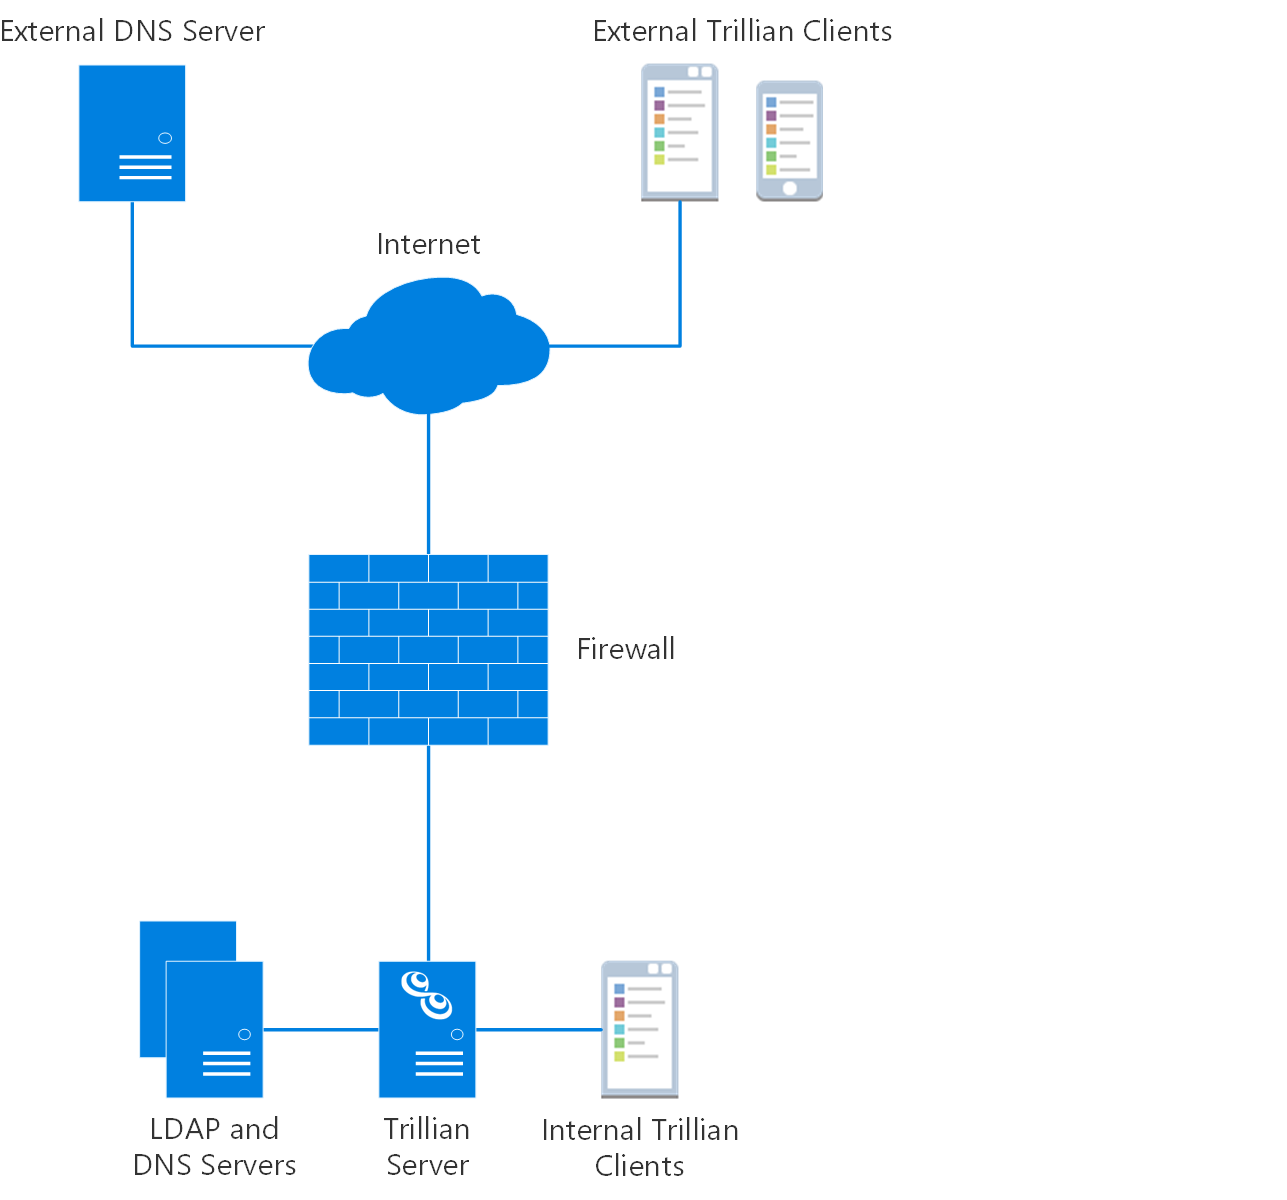
Reference Topology
Deploying
The first step of deploying Trillian Server is to install the server software itself. Download and double click the installer to get started; all required dependencies should be installed automatically and you will be prompted to launch the server manager after a successful install. In the event that your machine needs to be rebooted after the install, reboot and launch server manager by hand.
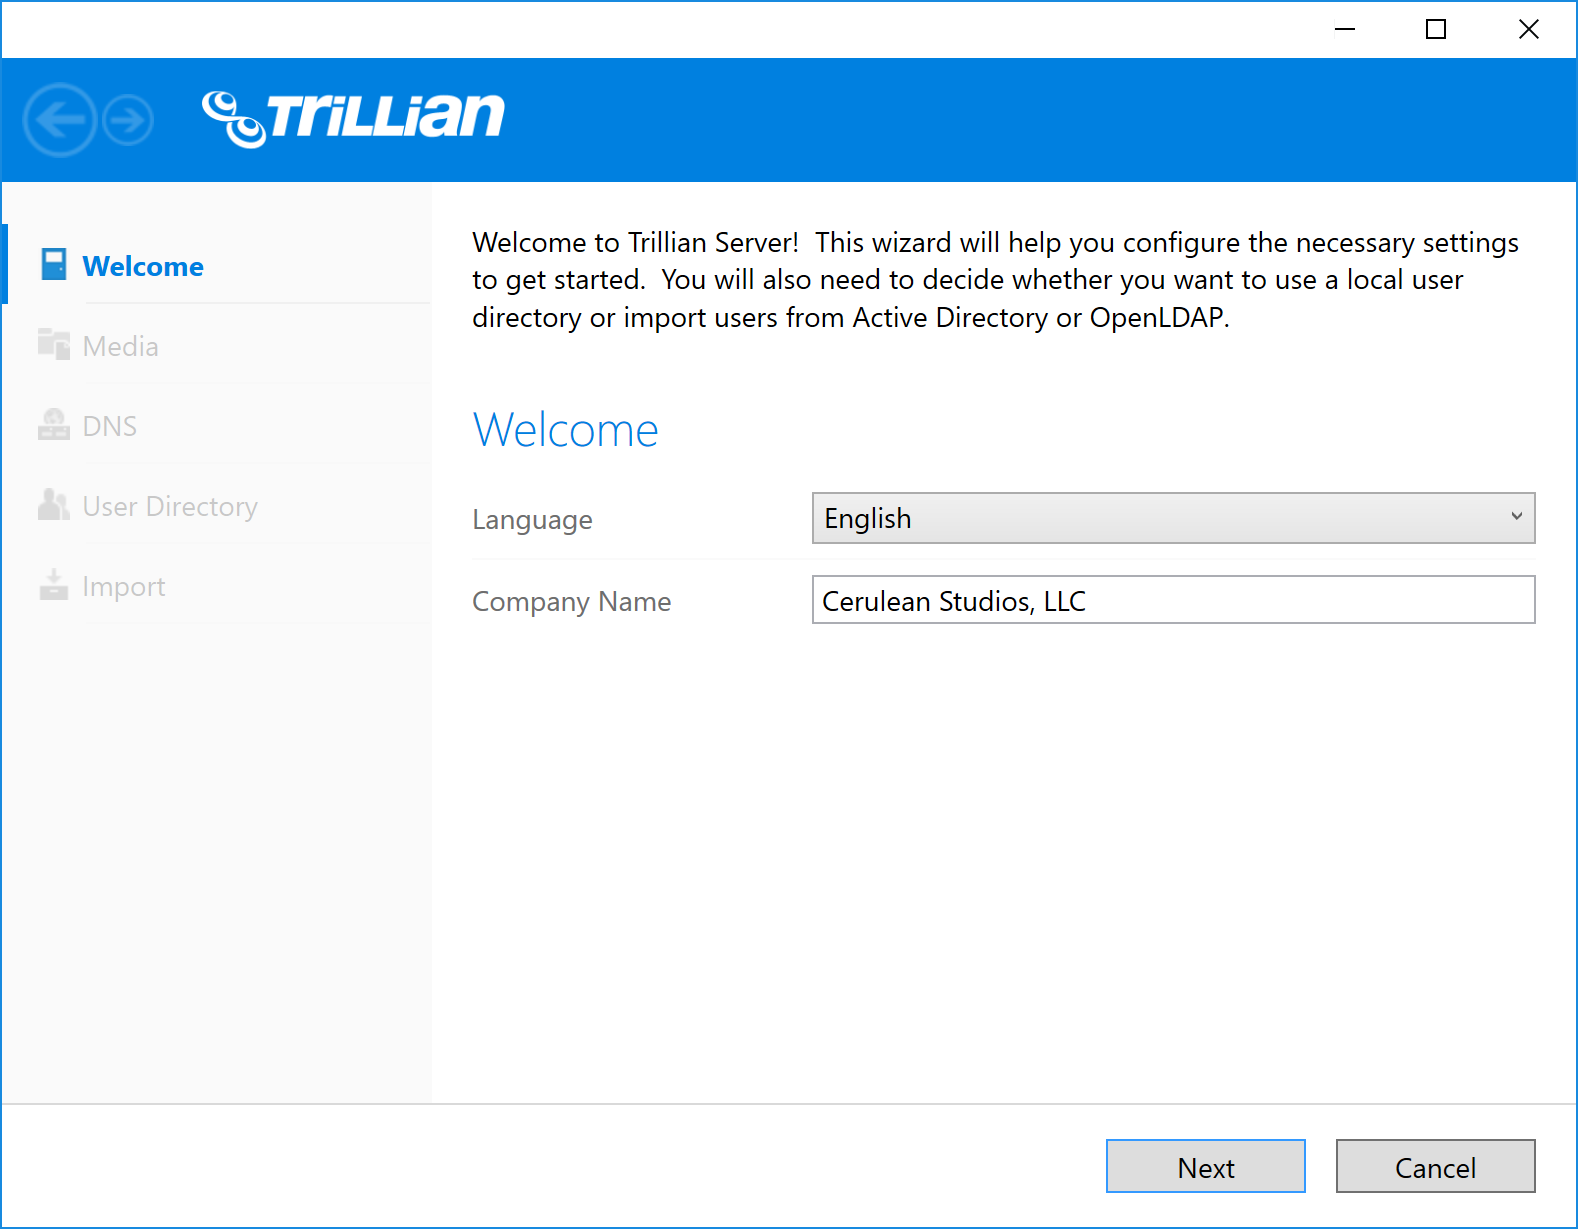
Welcome
After installation, you're greeted with a welcome page where you can provide your full company name to get started. The company name is purely for aesthetics, so make it neat!
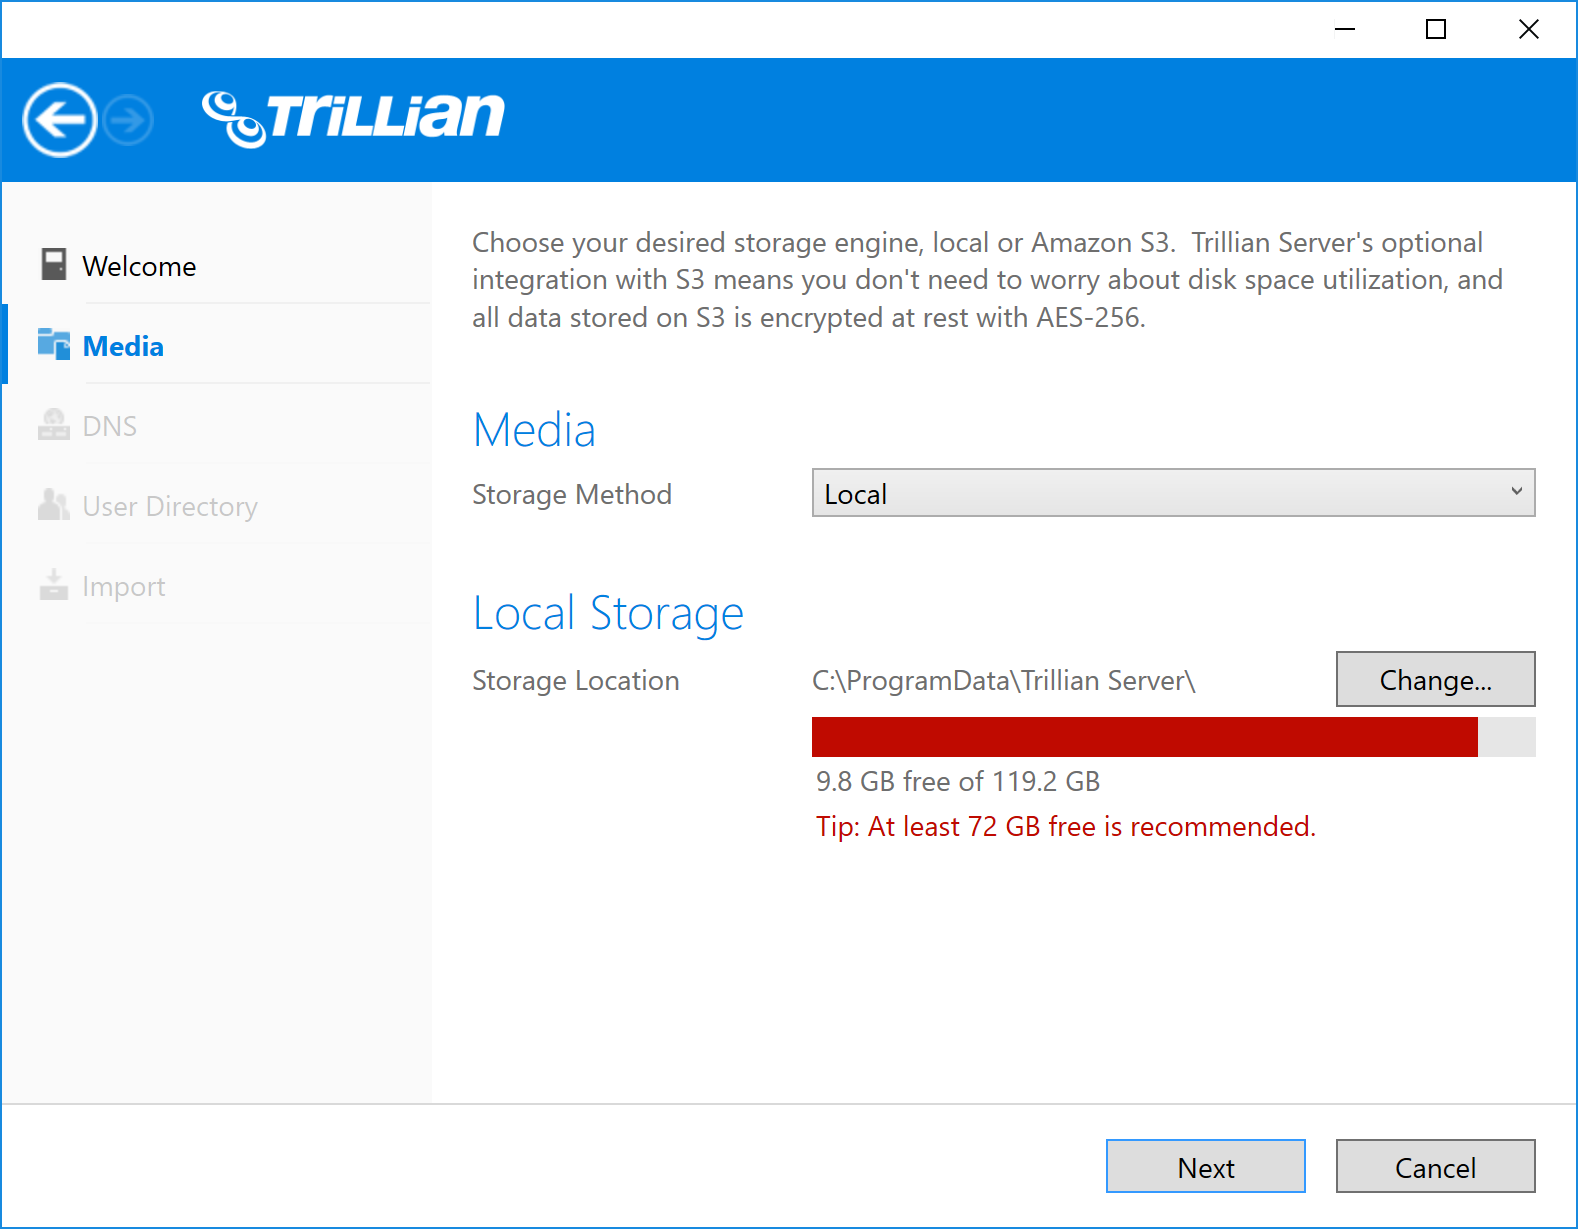
Media
The media step is where you decide whether you want to store your data locally or using a combination of local and cloud storage powered by Amazon S3. If you choose to utilize Amazon S3, you will gain the benefit of encrypted cloud backups and don't have to worry about disk space utilization as users grow their chat histories and share files and images. All data stored on S3 is first encrypted locally using AES-256.
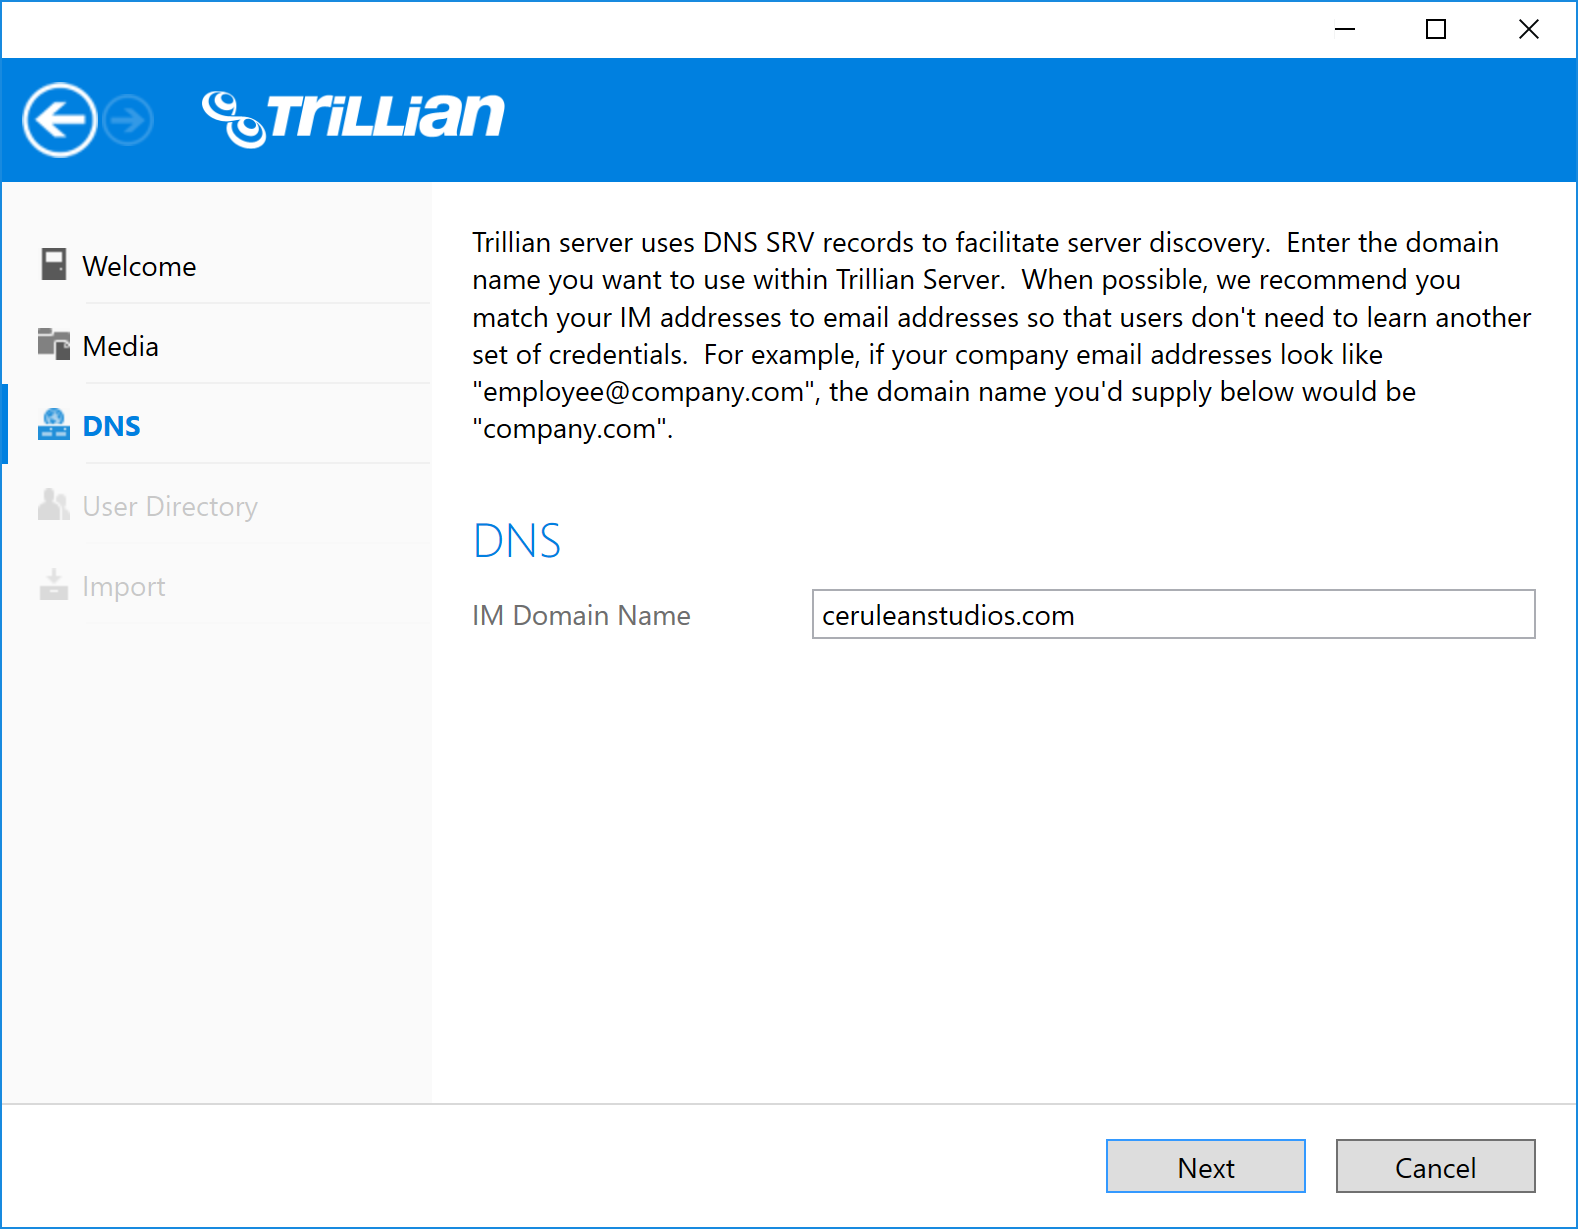
DNS
The DNS step is where you select your IM domain name. Trillian Server will automatically generate a self-signed TLS certificate to match the domain name you choose. You will have the opportunity to provide a CA-signed certificate after the installation process.
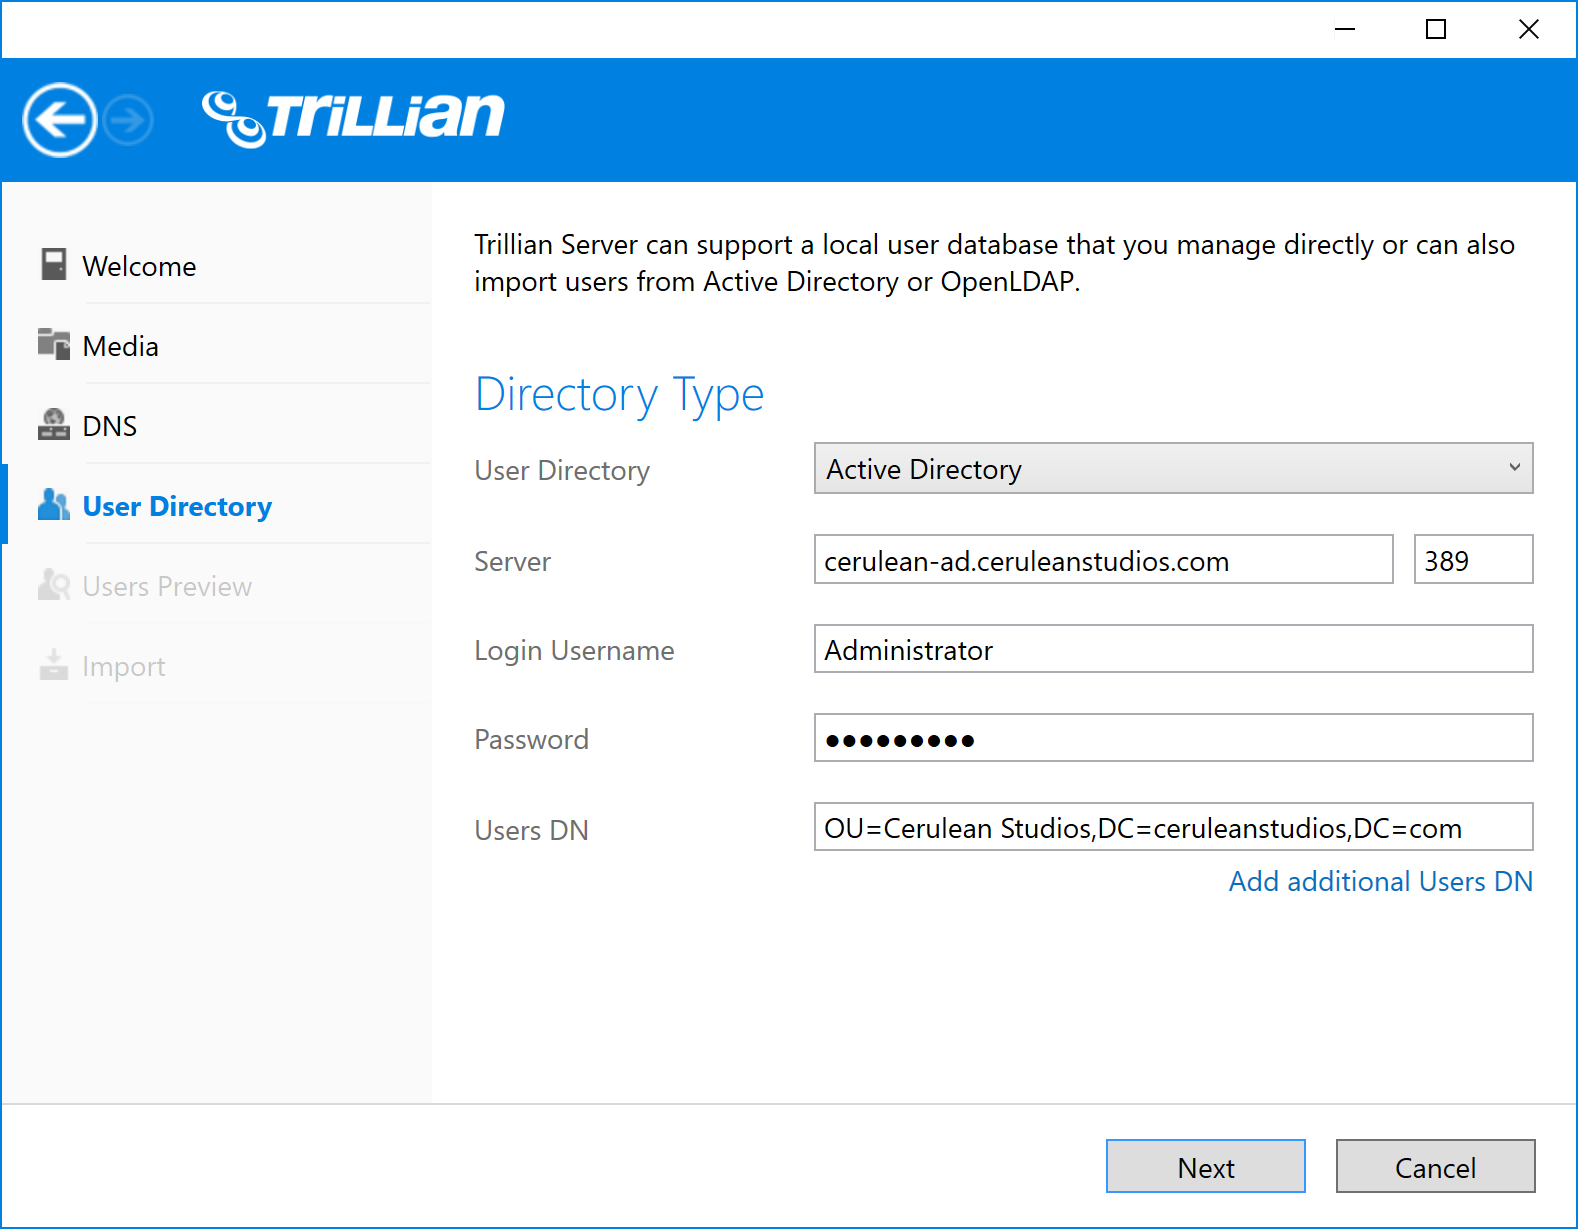
User Directory
The user directory step is where you determine where Trillian Server should source your users from. You can either add them by hand using the internal directory option or connect Trillian Server to an Active Directory or OpenLDAP environment and import your users from there. When importing, you must provide the distinguished name (DN) of the container you want Trillian Server to source users from. Note that when Trillian Server looks for users, it attempts to crawl all the children of the DN you provide, including OUs and actual group objects. The value of this DN will depend entirely on your particular layout, but Trillian Server will suggest a default to try if you're unsure.
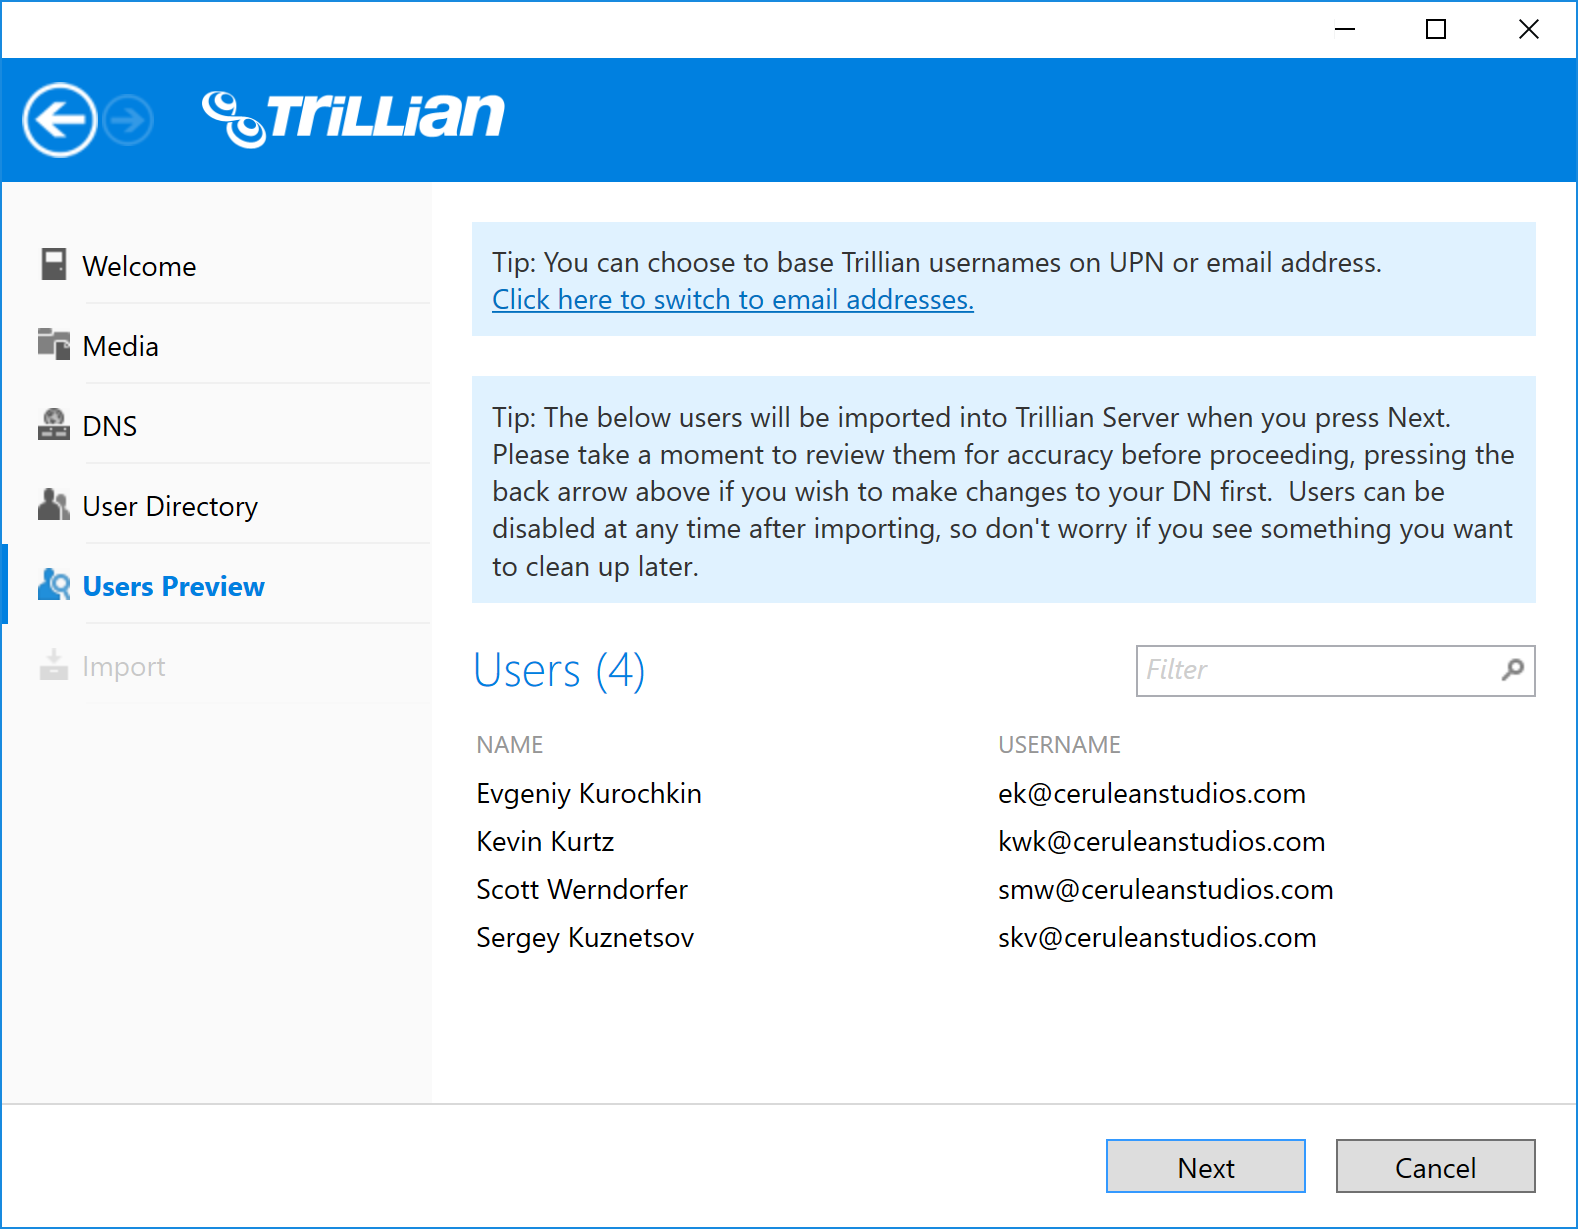
Users Preview
If you've opted to import users from Active Directory or OpenLDAP, the users preview step will then show you the users Trillian Server has found. Take the opportunity to review your users; if things look incorrect, simply press the back button in the upper left and try again.
| If Trillian Server finds valid email addresses for your users, the option to switch between UPN and email will be presented to you here. |
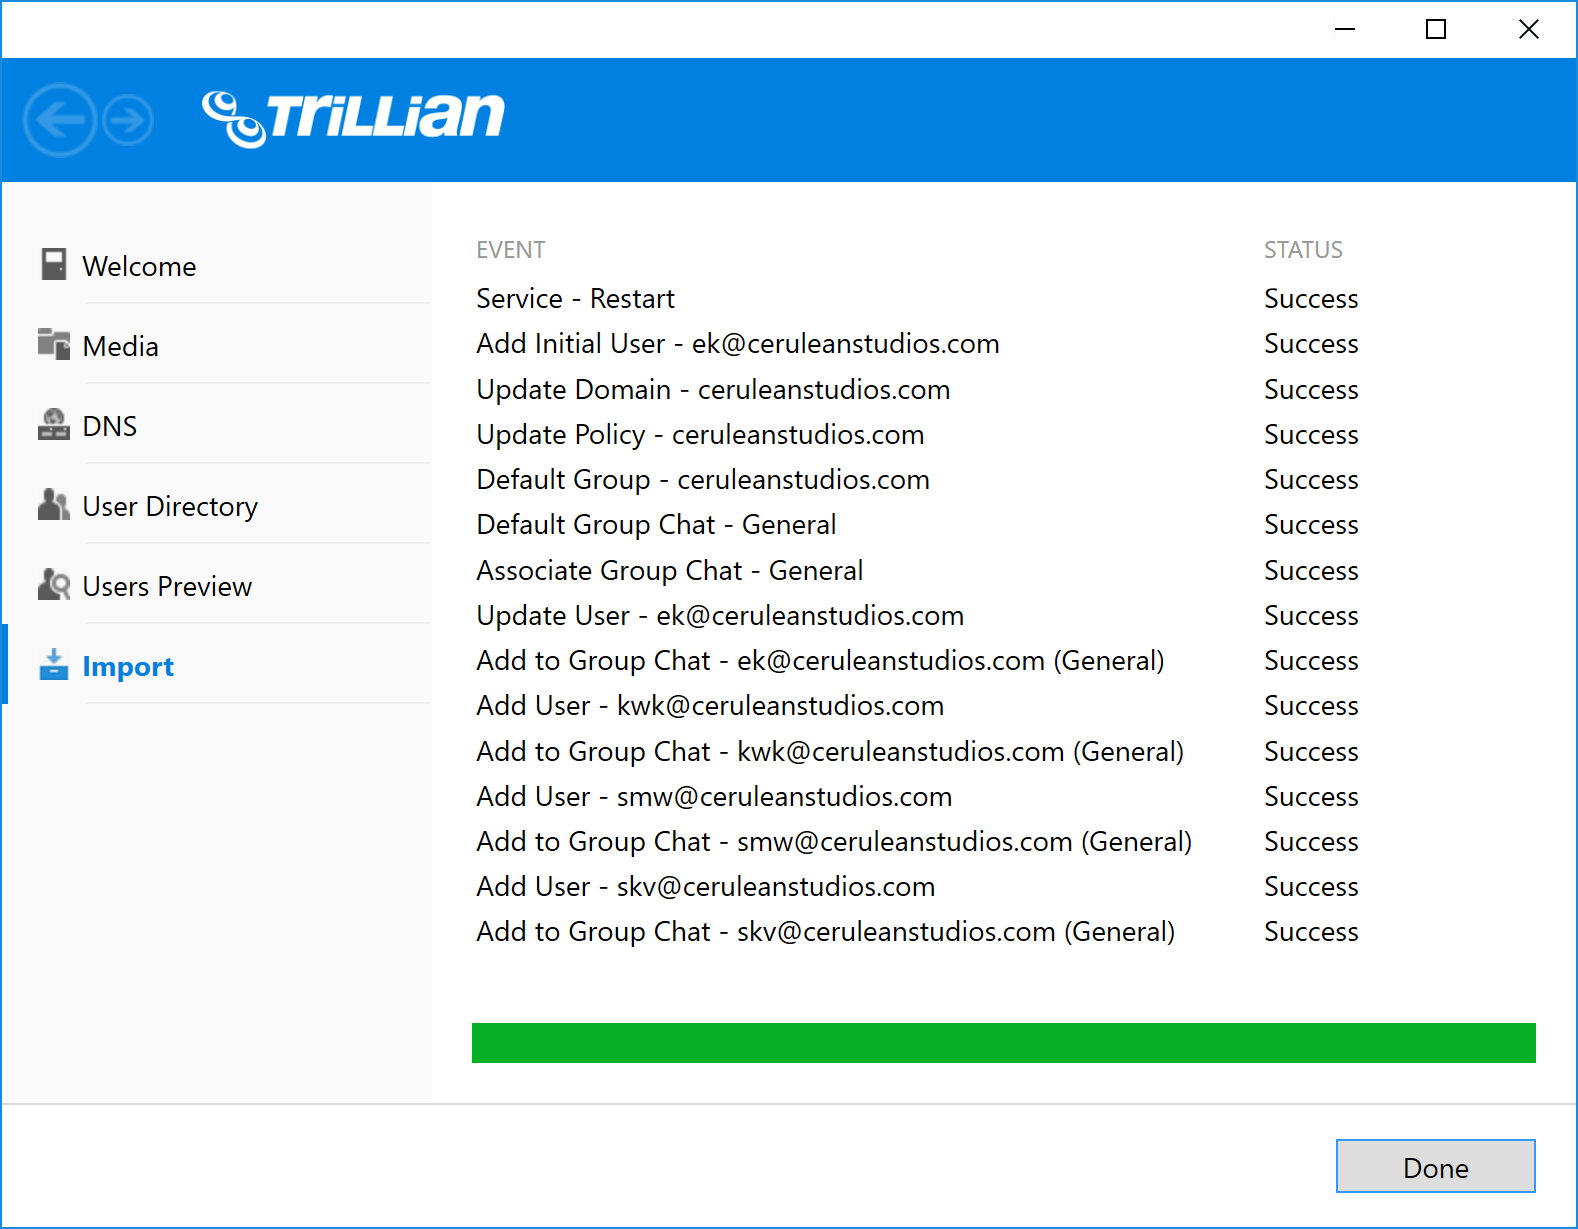
Import
During this step, Trillian Server is performing the actual import of your users into its internal database. If all goes well, you will be moved to the dashboard and can begin testing clients and tweaking settings!
Administration
These sections are intended for use by the individual(s) who will be responsible for the day-to-day administration of Trillian Server within their organization. A successful Trillian Server installation and initial configuration is assumed - if you have yet to perform these steps, please start with the getting started guide first.
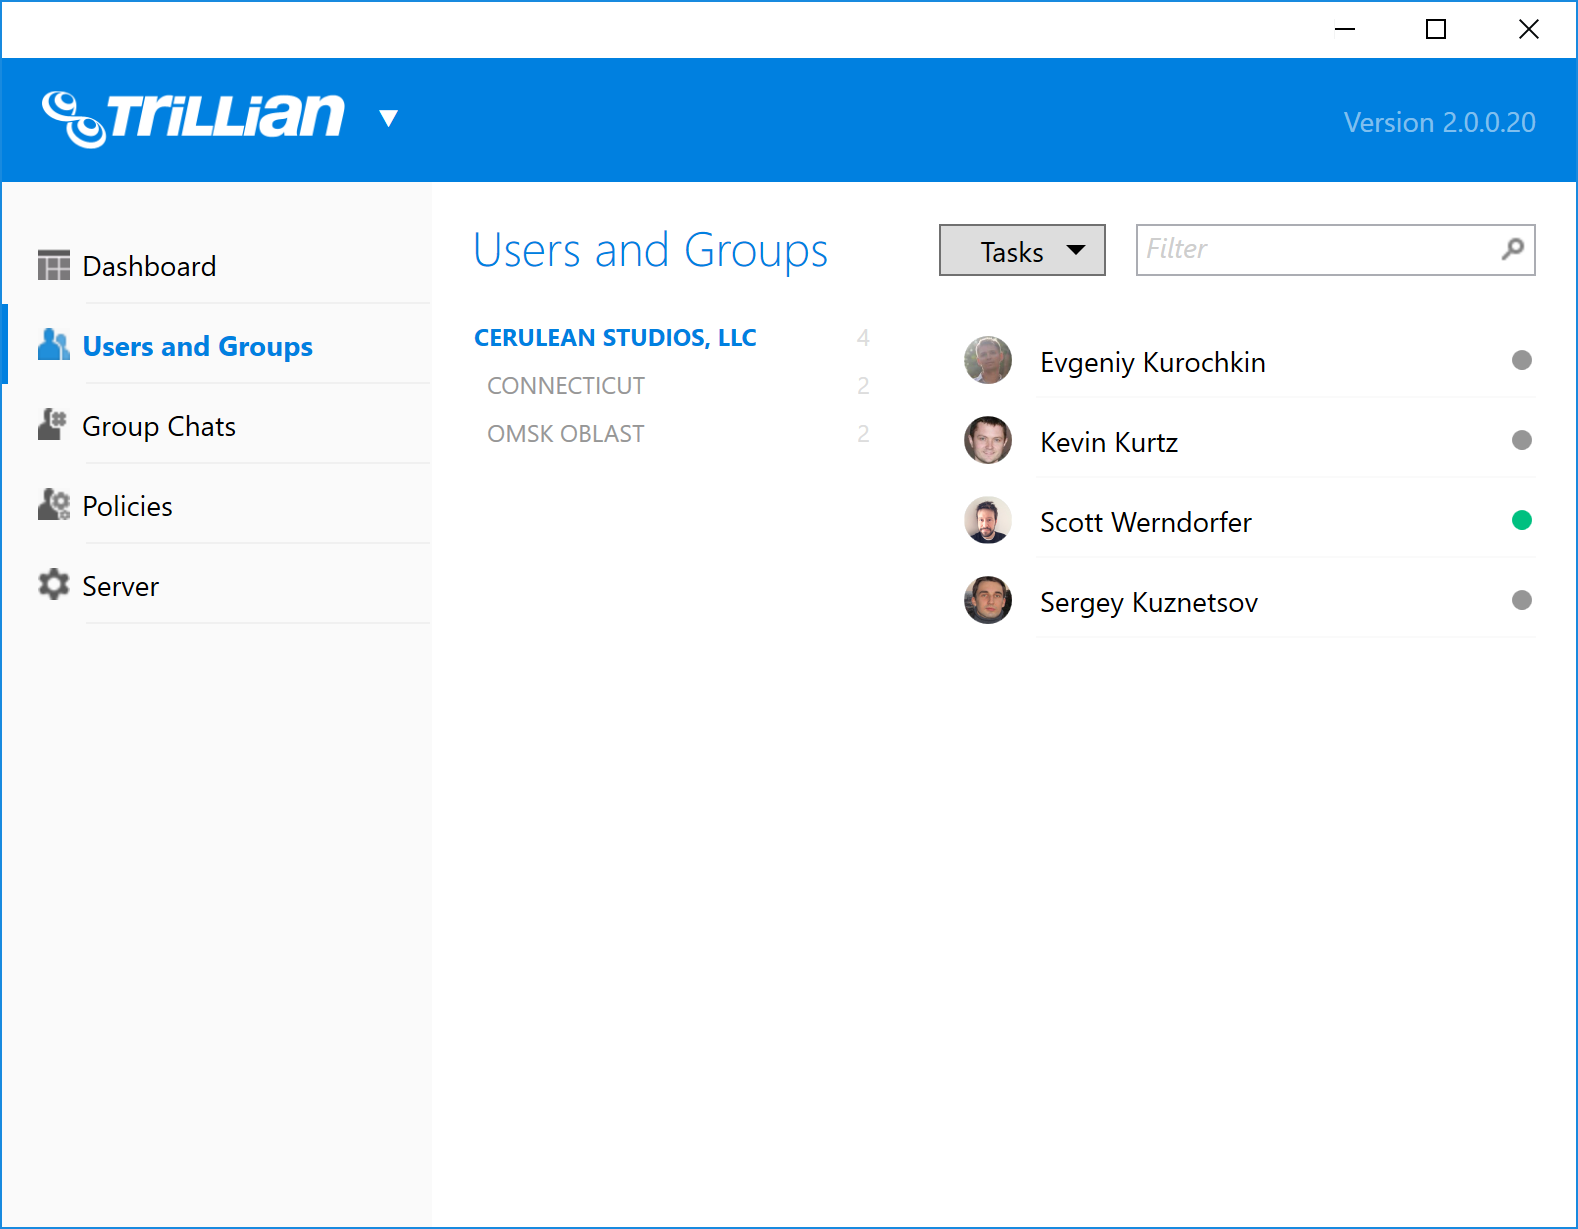
Users
Users are those individuals that you've chosen to import into or add to Trillian Server. Every non-disabled user has access to sign into your Trillian environment.
| If one or more of your users already uses Trillian, remember that they will need to sign out of their existing accounts and sign back in with their business credentials, which are all of the "user@domain.com" format! |
User Details
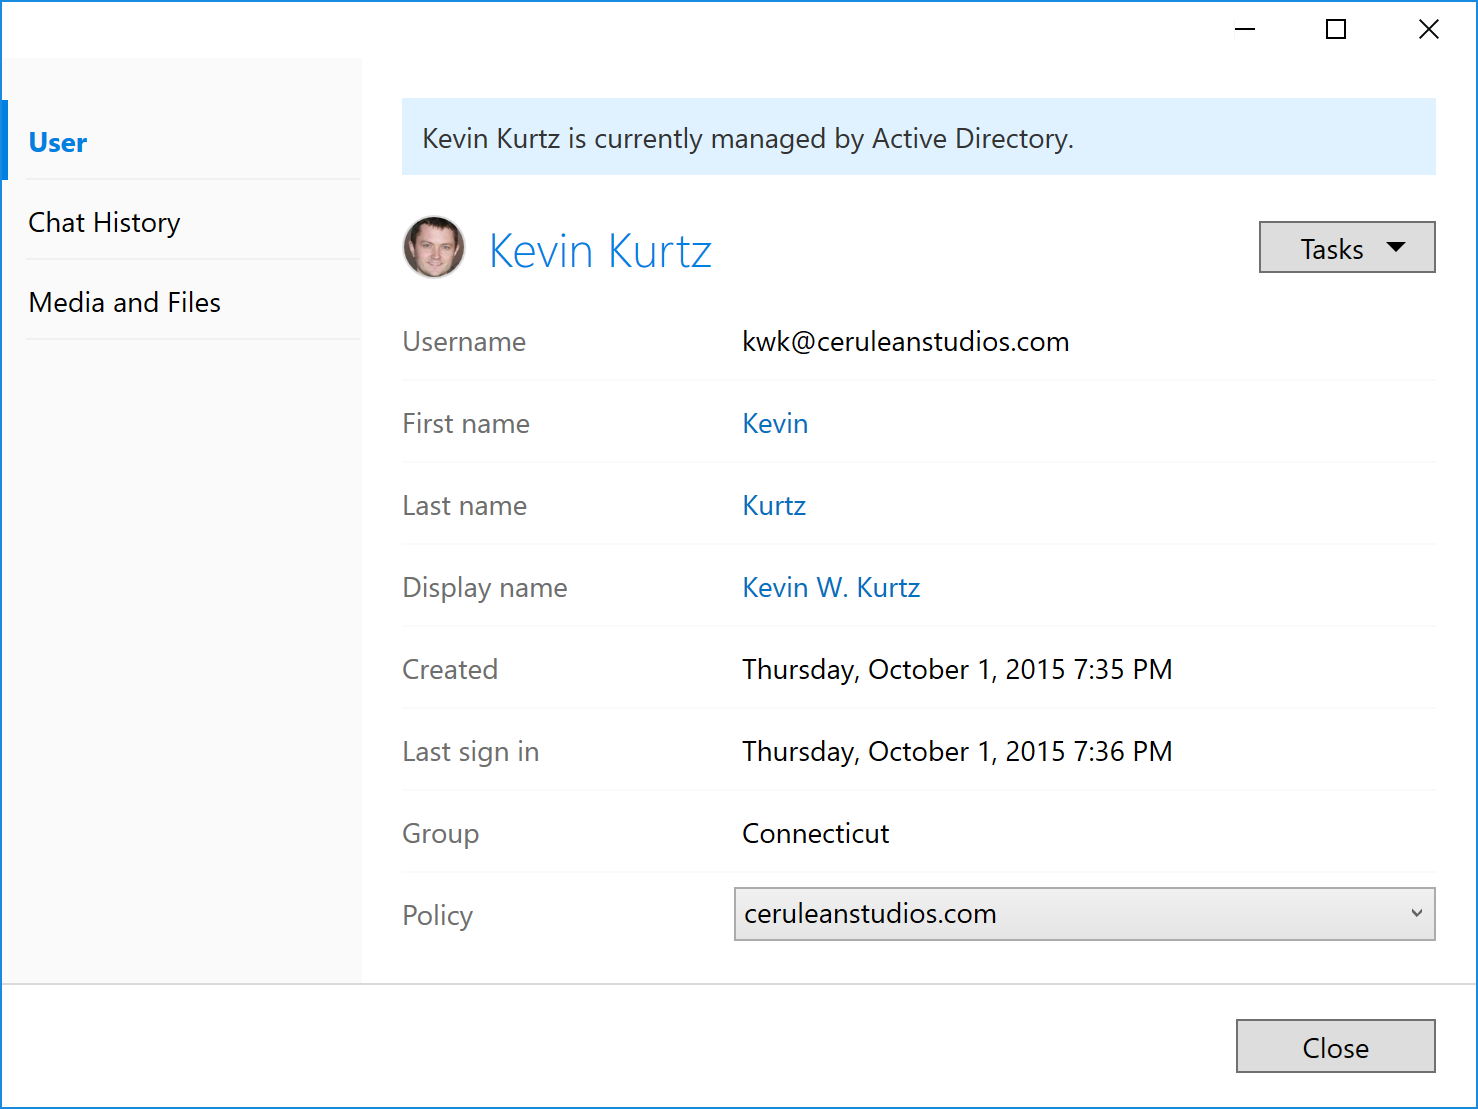
First and Last Name
A user's first and last name are used throughout Trillian Server to refer to the user. They are also used as the basis for the initially calculated user display name, which can be changed later by users or administrators.
Display Name
Separate from the first and last name is the display name, or "IM Display Name". This is the value that will be displayed to other Trillian users if they have this user on their contact list. The main purpose of a separate display name (versus just leveraging first and last names) is so that administrators can easily locate employee "Tricia McMillan" but Tricia can opt to appear as "Trillian" to her co-workers.
| You can prevent users from changing their display name by disabling the Allow clients to change their display name option in the Client section of the user's assigned policy. |
Policy
The policy currently bound to this user.
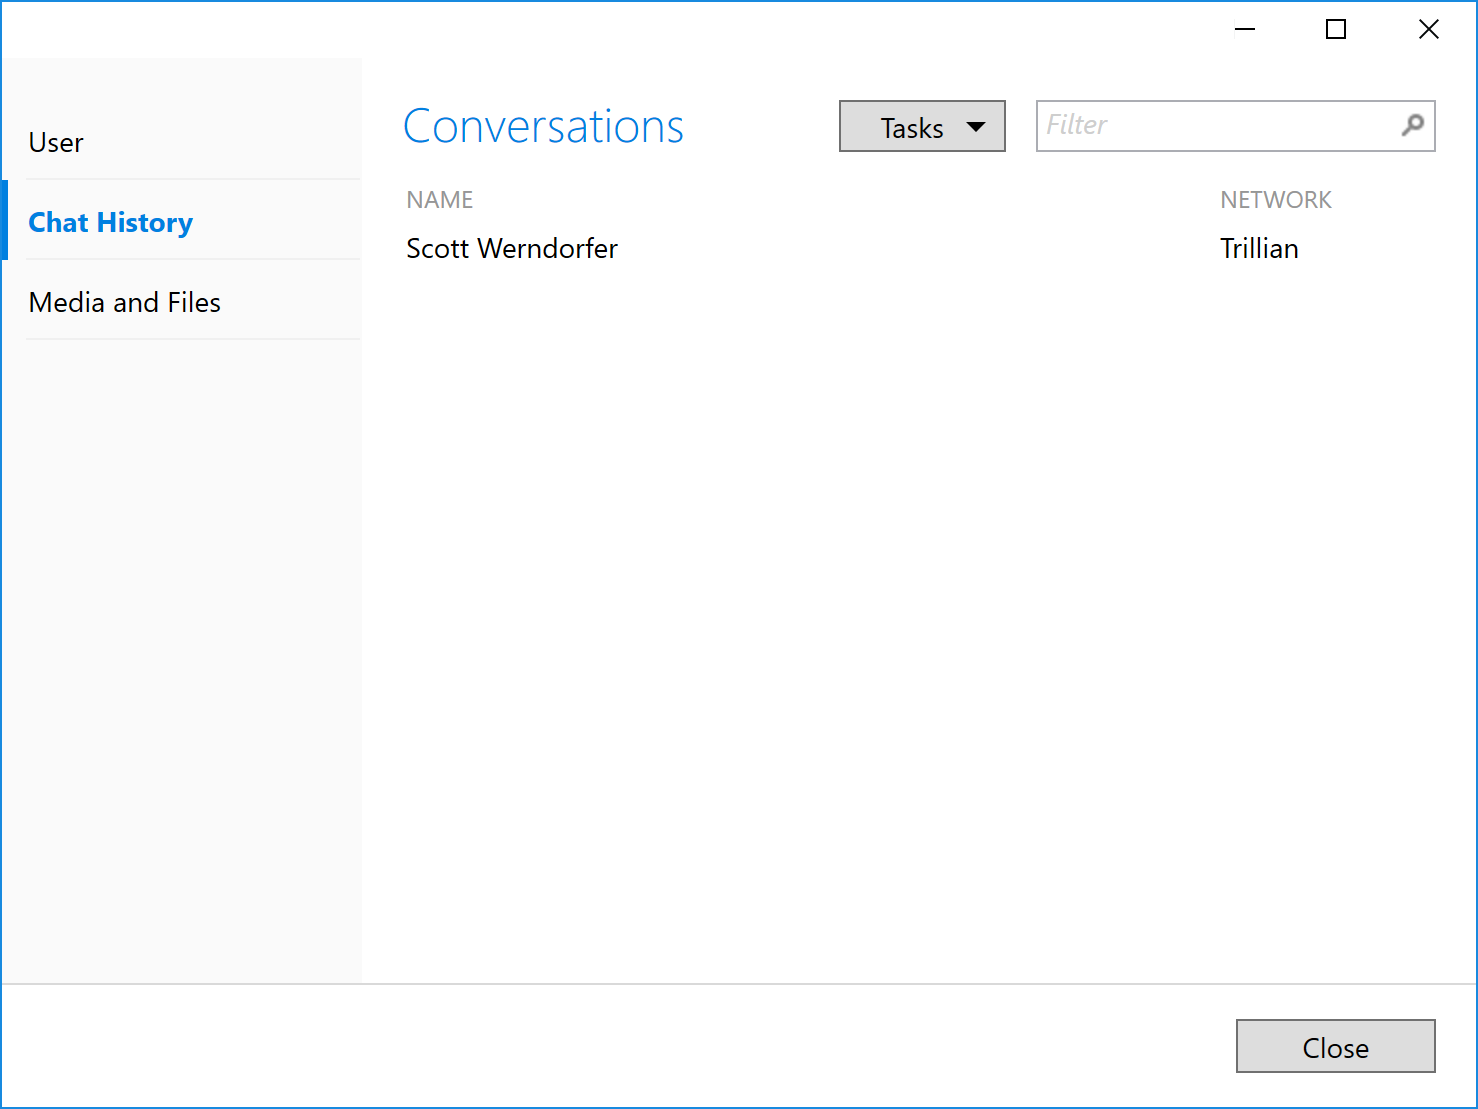
User Chat History
View individual conversations, export conversations to a text file, or delete conversation data.
| There is a delay between the time a message is sent and the time it will appear in the chat history browser. If you are running a test to make sure data is being archived, close the chat window on the Trillian client or wait 30 minutes. |
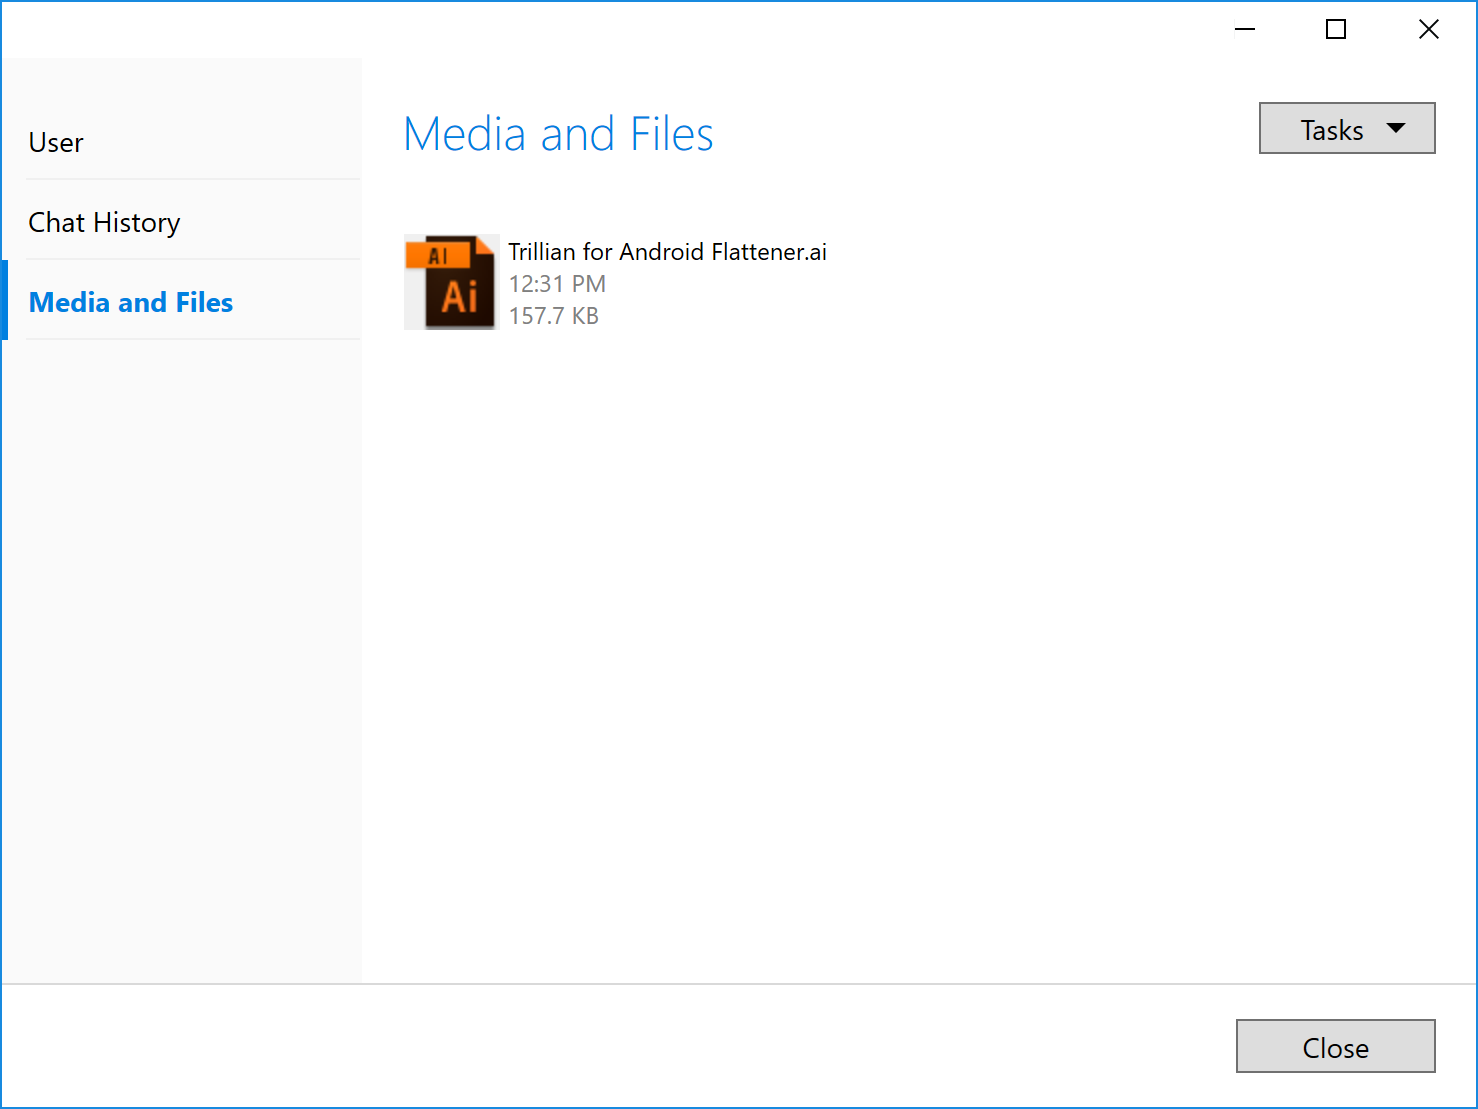
User Media and Files
All images, voice clips, and files shared by the user appear here.
| File transfers use peer-to-peer connections by default, which means Trillian clients will attempt to connect to each other to facilitate the transfer, circumventing the server. Images and voice clips are sent through the server by default. Therefore, if you wish to see file transfer activity for your users here, make sure to change the file transfer policy accordingly. |
Adding Users from Active Directory or OpenLDAP
If you're using Active Directory or OpenLDAP with Trillian Server, synchronization is how you'll add new users to Trillian Server. To sync changes from LDAP:
- From the Users and Groups page, click Tasks > Synchronize with Active Directory or Tasks > Synchronize with OpenLDAP.
- On the User Directory page, review the displayed settings for accuracy, especially your usernames and passwords!
- If you need to add an additional DN from which to pull users, click Tasks > Add Users DN to provide it.
- If you need to delete an existing DN, click it to highlight it and click the X button that appears on the right side.
- Once things look good, click Next. Trillian Server will now connect to your LDAP environment and look for changes.
- If changes are found, click Synchronize if you wish to proceed or Back if you need to modify settings and try again.
- Click Done.
| Your LDAP directory is considered authoritative, and Trillian Server never makes any writes back to the directory. This means it's always safe to make changes on the Trillian side without worrying about modifying or harming your LDAP environment. |
Adding Users Manually
If you've opted not to tie Trillian Server into an LDAP directory, you are responsible for adding users manually. From the Users and Groups page, click Tasks > Add User... to add a user.
Modifying Users
To modify a user:
- From the Users and Groups page, find or search for the user you wish to modify.
- Double click the user.
- From the User Details view, make any necessary changes.
- Click Close.
Disabling Users
When a user is disabled, that user will be disconnected from Trillian Server and no longer able to sign in. Chat history and all user settings will be preserved for disabled users. Users are disabled automatically during LDAP synchronization if found to be in a disabled state on the LDAP side. You can also disable a user manually:
- From the Users and Groups page, find or search for the user you wish to disable.
- Double click the user.
- From the User Details view, click Tasks > Disable.
- Click Close.
| Trillian Server never enables a disabled user. This means that you can safely disable users on the Trillian Server side who are still enabled on the LDAP side if for some reason you don't want them having access to Trillian. This also means that if a user is disabled on the LDAP side, and later re-enabled on the LDAP side, you will need to manually re-enable the user on the Trillian side as well using the same steps as above but selecting the Enable option. |
Deleting Users
When a user is deleted, that user will be disconnected from Trillian Server and no longer be able to sign in. Additionally, deleting a user permanently deletes their chat history and any of their uploaded media. To delete a user:
- From the Users and Groups page, find or search for the user you wish to disable.
- Double click the user.
- From the User Details view, click Tasks > Delete.
- From the User Delete view, select Delete user permanently.
- Optionally choose to export this user's chat history and/or media and files.
- Click I understand that all chat history and related media and files will be deleted.
- Click Delete.
| Deleting a user can come in handy if your organization re-uses login credentials for new employees. For example, if Tricia McMillan quits and you later hire Tricia Beeblebrox, you can delete "tricia@ceruleanstudios.com" completely and re-use it for the new Tricia. |
Groups
Groups allow you to visually organize your users by department, geographical location, or anything else that feels right for your company. Groups are utilized a few different ways in a Trillian environment:
- Visual organization of contacts. The groups and group membership you define in Trillian Server will be visually reflected on the client's contact list, allowing you to neatly group your organization in whatever way you choose.
- Population of the contact list. By default, all users can see all other users within the organization on their contact list, but you can customize this using group visibility. For example, you might define visibility such that the "Temporary Employees" group can only see other users of the "Temporary Employees" group.
- Population of group chats. By setting up a "Marketing" group, you can later configure a group chat such that members of said "Marketing" group are automatically added to a particular group chat. This way, as you import users into Trillian Server over time, employees who belong to particular groups are automatically added to the correct group chats.
Group Details
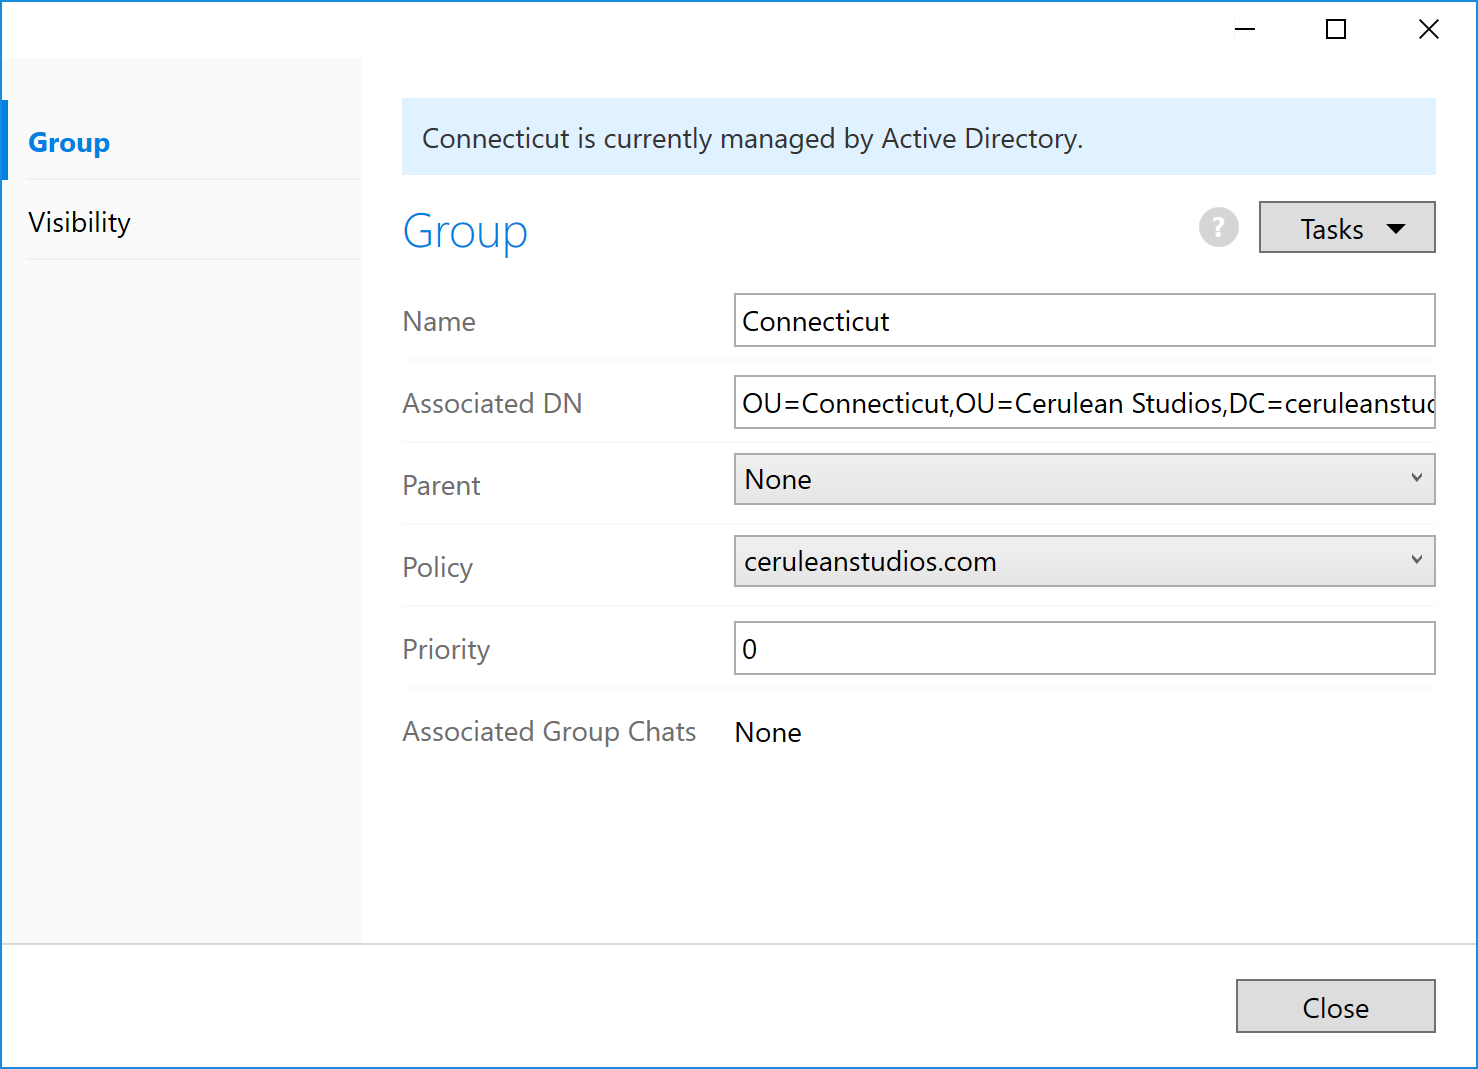
Name
The name of the group as it should appear on user contact lists.
Associated DN
If you're using Active Directory or OpenLDAP, you can optionally choose to bind groups to specific DNs on the LDAP side. If you do, as users are imported into Trillian Server they will automatically be added to the groups who are bound to DNs that they belong to on the LDAP side. For example, if you bind the Trillian group "Connecticut" to the DN "CN=Connecticut,OU=Cerulean Studios,DC=ceruleanstudios,DC=com" and import a user "Tricia McMillan" who belongs to it, she will be automatically added to the "Connecticut" group on the Trillian side.
Parent
Trillian clients support groups-within-groups; you can achieve this by assigning a group another group as its parent. This is a purely visual relationship and has no bearing on policy enforcement or anything else.
Policy
The policy currently bound to this group. Users who are added to this group will automatically inherit this policy.
Priority
Trillian Server only allows users to belong to a single group. In the event that a user belongs to more than one group on the LDAP side, Trillian Server will make a best effort attempt at selecting the right group to use. If you wish to control this selection, you can optionally assign priority to your groups after adding them. Groups with higher priority are used first. For example, if your user "Tricia McMillan" exists in the all-encompassing "IT" OU and the regional "IT-Connecticut" OU, you can assign a higher priority to "IT" to ensure Trillian Server adds her to the "IT" group.
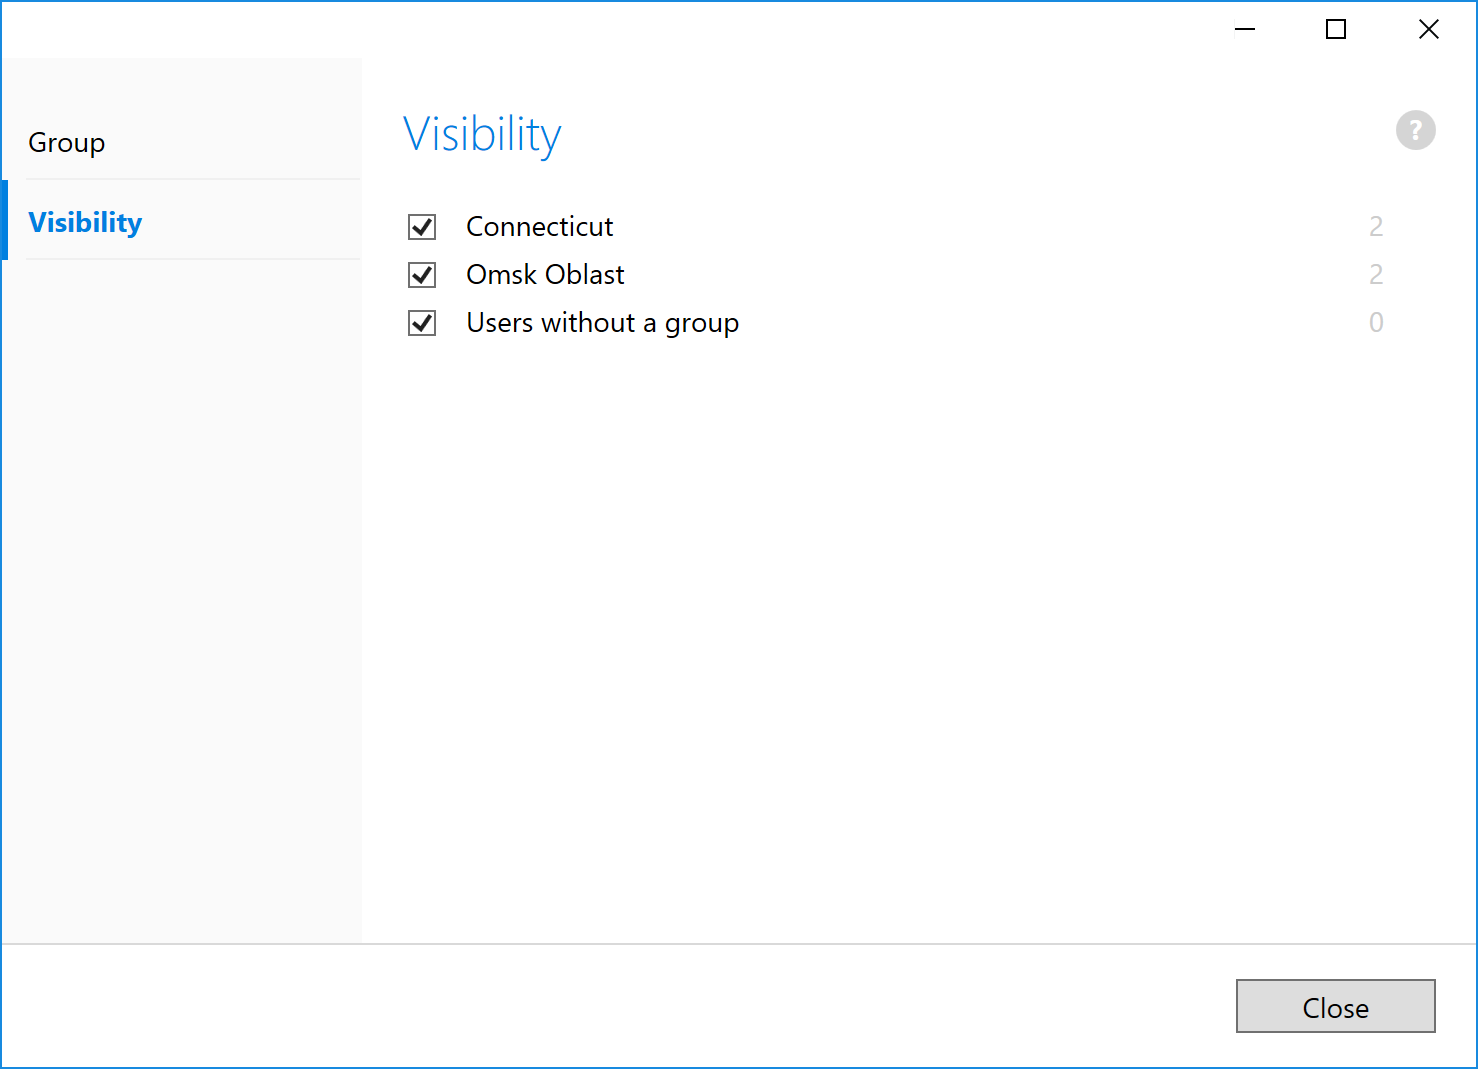
Group Visibility
By default, new groups are created in an "everyone-can-see-everyone-else" environment. To change this, you can modify individual group visibility to determine which other groups a given group should be seeing on its contact list and vice versa. As soon as you check or uncheck a group inside the visibility page, connected Trillian clients will update accordingly and add or remove contacts to reflect your changes. There is no need to restart either the server or client after making visibility changes.
Adding Groups
From the Users and Groups page, click Tasks > Add Group... to add a group.
Modifying Groups
To modify a group:
- From the Users and Groups page, find the group you wish to modify.
- Double click the group.
- From the Group Details view, make any necessary changes.
- Click Close.
Deleting Groups
To delete a group:
- From the Users and Groups page, find the group you wish to delete.
- Right click the group and select Delete.
| If you delete a group that has users in it, those users will either by assigned to other groups (if they belong to multiple groups on an LDAP backend) or assigned to the default "Users without a group" group. |
Group Chats
Group chats are many-to-many conversations that persist on the server. Use them to bring teams together into a single place that encourages collaborative and focused communication. Group chat membership can be controlled by administrators directly, bound to group objects, or even free-form, allowing users to come and go as they please. Some examples:
- The company watercooler. Create a group chat and choose the "add all users to group chat" option. As new users join your company, they will automatically be added to this group chat. Share lunch orders, silly photos, and general company chatter in this group chat.
- A division-oriented chat. Create a group chat and choose the "add users to this group chat based on their group" option, selecting your sales team's group. Your sales staff will have their own private group chat to share lead information, sales goals, etc.
- A location-specific chat. Have teams working across the world? Create a group chat specifically for each geographical location, ensuring conversation specific to a particular office stays isolated from the rest of the group.
- An ad-hoc chat. If Tricia and Zaphod need to bring Marvin into a discussion quickly, they can do so within the Trillian client at any time, creating a private, ad-hoc group chat just for them. The chat will continue to persist on the server and be visible to administrators under the "private group chats" group on the left. Ad-hoc group chats empower your users to communicate in groups without having to wait for special administrative privilege or provisioning.
| Trillian Server automatically creates a company watercooler in the form of a group chat named "General". You can disable or alter this group chat as you please, but it's a handy way to get everyone into the same place and familiar with group chat functionality. |
Group Chat Details
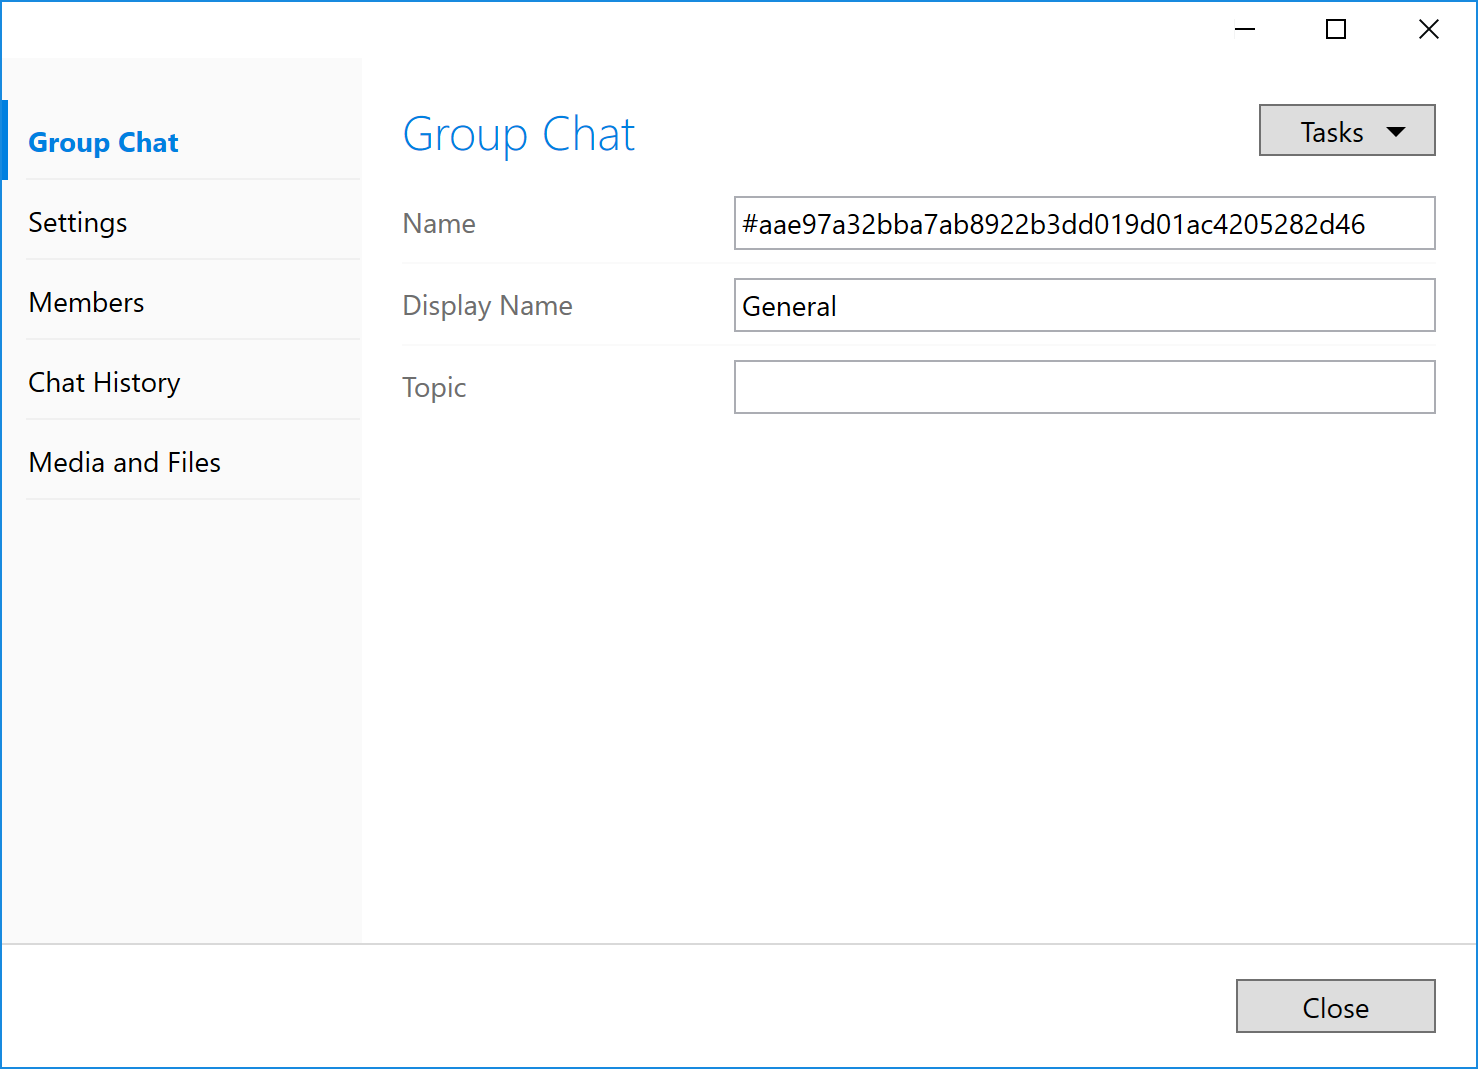
Name
An internally-generated, read-only unique identifier for the group chat.
Display Name
The name of the group chat as it should appear on user contact lists.
| By default, the display name of a group chat can only be changed by administrators or chat operators. You can remove this restriction in settings. |
Topic
Displayed at the top of the group chat window within the Trillian client, topic are often used to keep chat members aware of the current status of a given milestone, event, or just used to leave goofy messages for a team. Think of them as a way to answer the question "what's the purpose of this group chat?"
| By default, the topic of a group chat can only be changed by administrators or chat operators. You can remove this restriction in settings. |
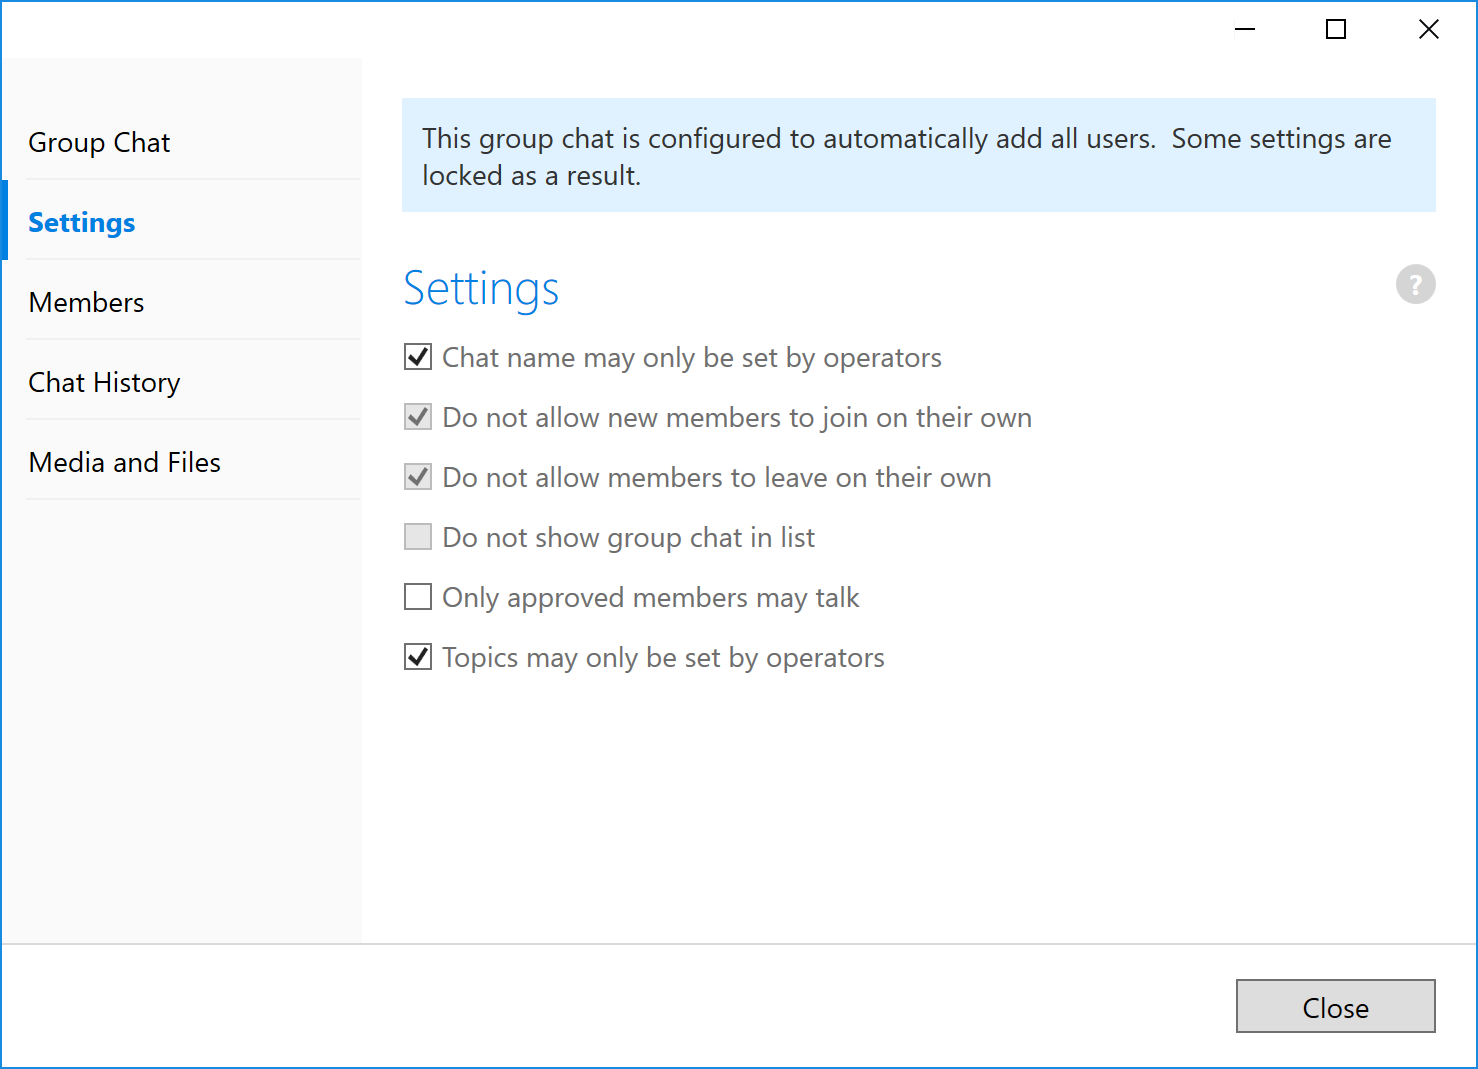
Group Chat Settings
Operator status can be assigned to one or more members, and operators can assign operatur status to other members at any time. There are a handful of different settings exposed to administrators and operators:
- Chat name may only be set by operators. If enabled, the name of this group chat can only be changed by operators.
- Do not allow new members to join on their own. If enabled, only operators can add new members to this group chat.
- Do not allow members to leave on their own. If enabled, only operators can remove members from this group chat.
- Do not show group chat in list. If enabled, this group chat will be hidden from public view when users request a list of group chats.
- Only approved members may talk. If enabled, only operators and members specifically given permission to speak ("voiced" members) may send messages in this groupchat.
- Topics may only be set by operators. If enabled, only operators can change the topic of this group chat.
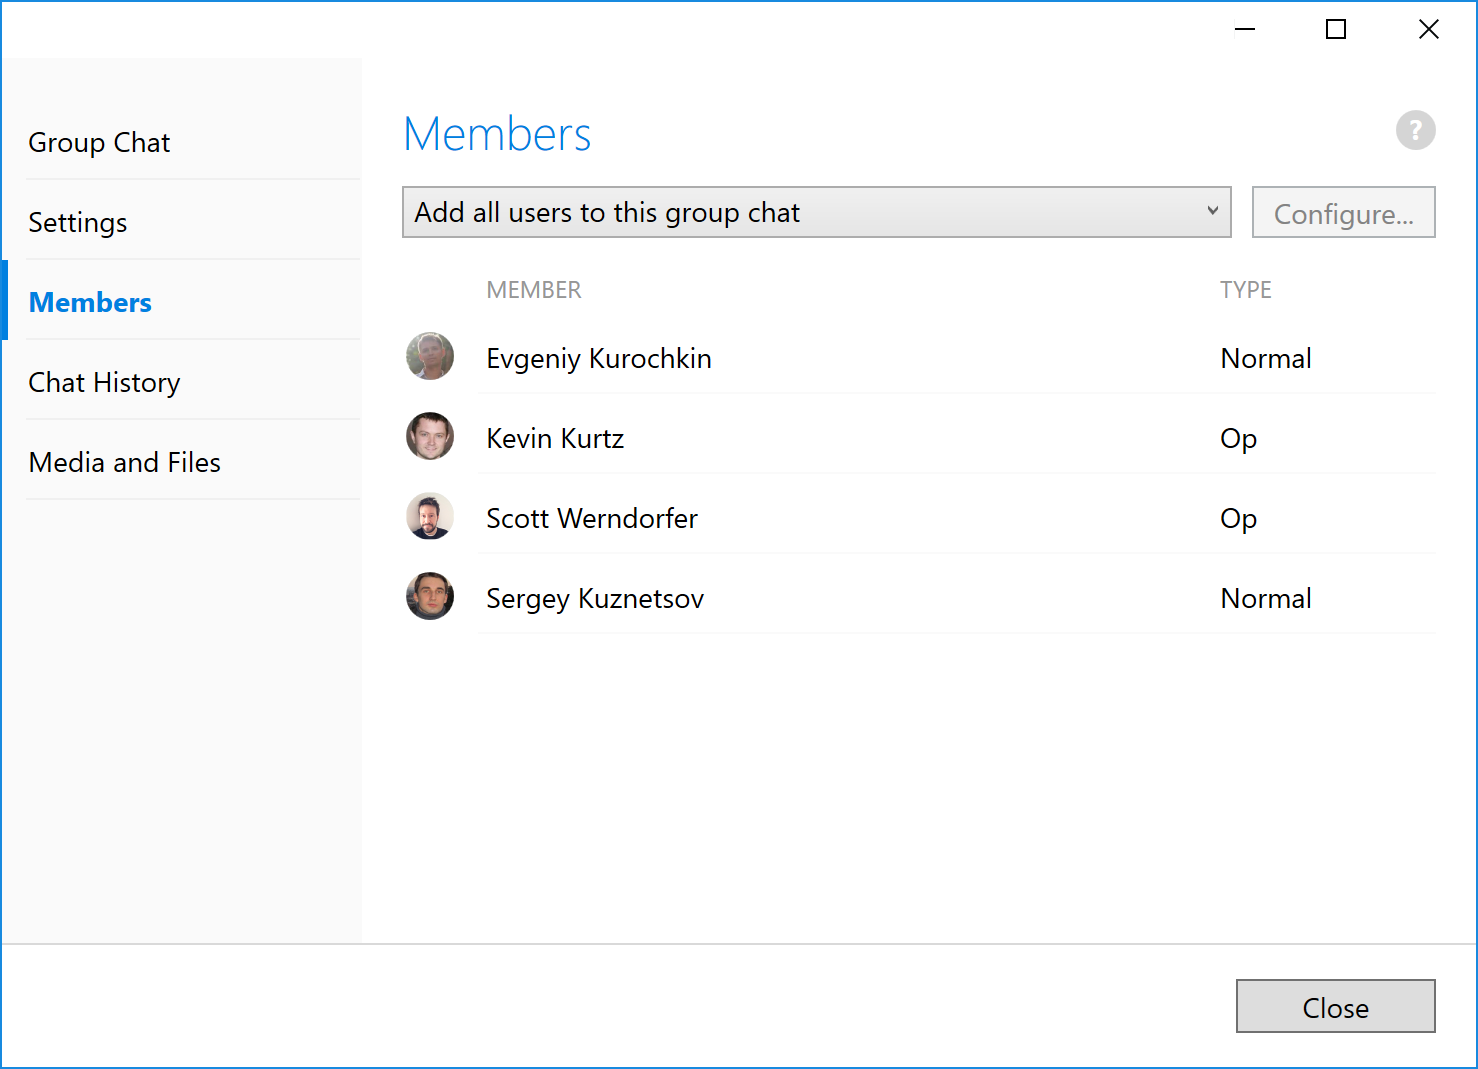
Group Chat Members
There are three ways to control group chat membership:
- Adding all users. This method adds every member of a domain to a given group chat and continues to add new users to the chat as they are added to the domain. By default, Trillian Server creates a group chat named "General" that does this for you as a way to provide an all-hands group chat, but you can configure other chats in this way as well.
- Adding users by group. This method allows you to bind one or more groups to a group chat, such that as members join groups they are also automatically added to the group chats bound to them. You can use this to have your entire IT staff join an IT-specific group chat, for example.
- Manual control. This method lets you add and remove members to and from a group chat as you choose, and also unlocks settings that allow users to join group chats on their own using various discovery features within Trillian clients.
In addition, all group chat members can receive two optional flags:
- Op. Operators are per-chat administrators - they can change settings and assign operator status to other members at any time.
- Voice. Voiced members can speak in group chats with the "only approved members may talk" setting enabled.
Group Chat History
View conversation data, export conversation data to a text file, or delete conversation data.

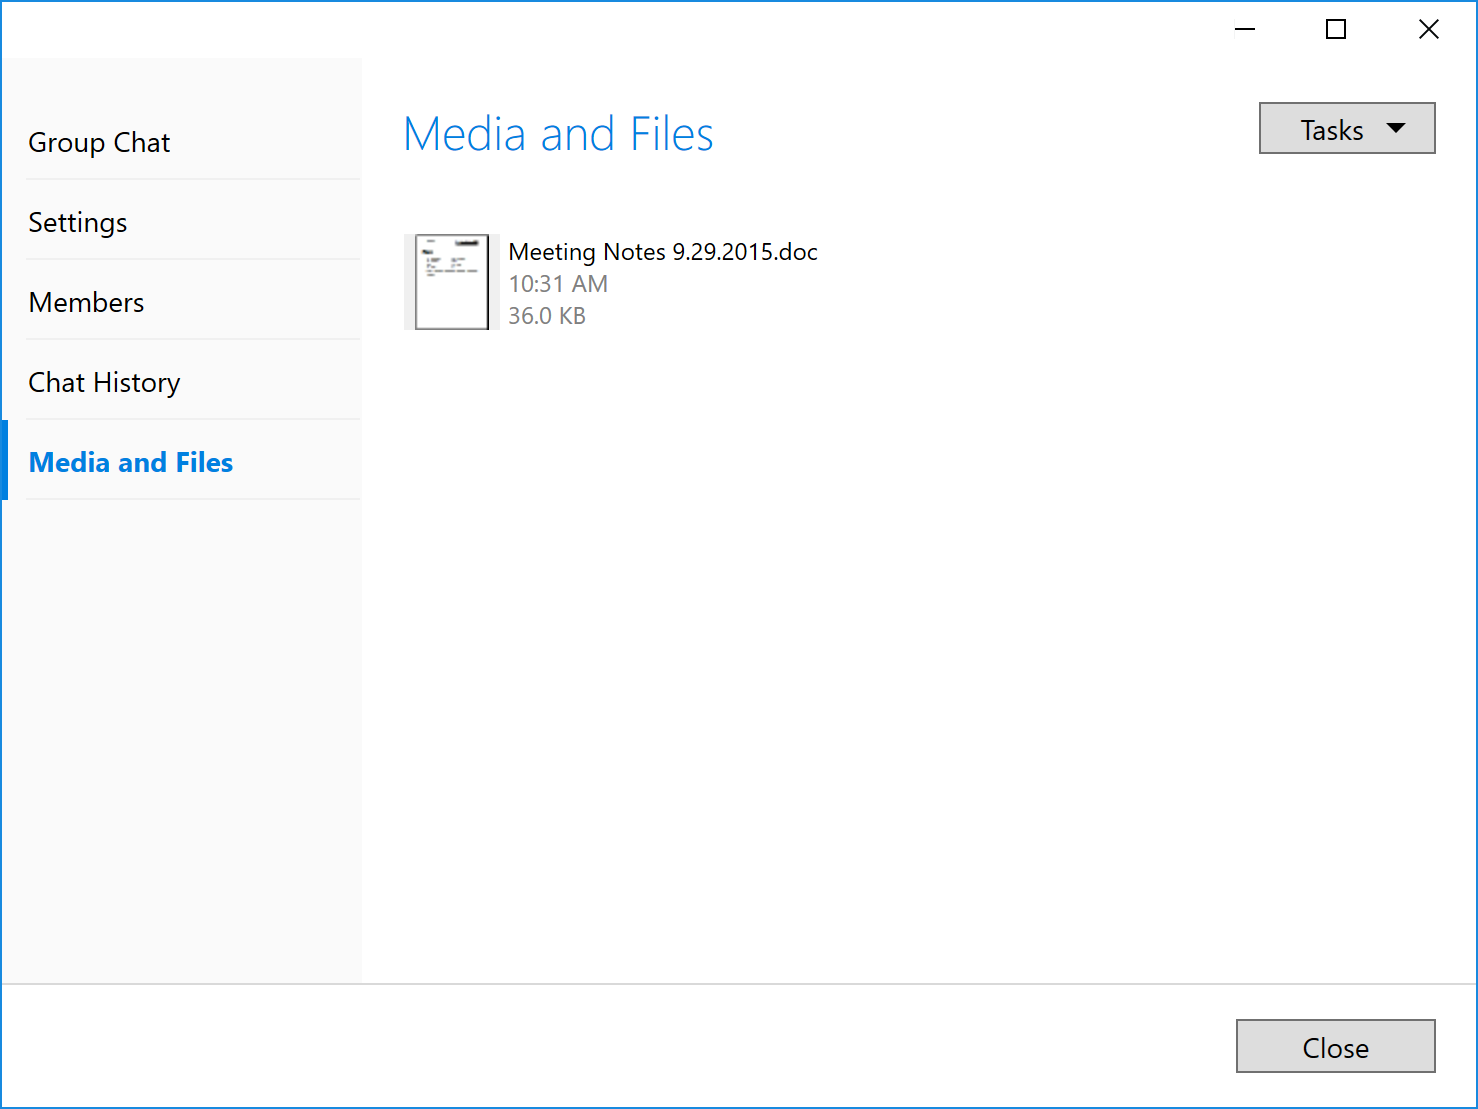
Group Chat Media and Files
All images, voice clips, and files shared by users in a group chat appear here.
| When users share media to a group chat, the group chat is considered to be the "owner" of said media. Accordingly, media shared to a group chat will only appear in the group chat enumeration, not the individual user enumeration found in Users and Groups. |
Adding Group Chats
From the Group Chats page, click Add Group Chat... to add a group chat.
Modifying Group Chats
To modify a group chat:
- From the Group Chats page, find the group chat you wish to modify.
- Double click the group chat.
- From the Group Chat Details view, make any necessary changes.
- Click Close.
Disabling Group Chats
To disable a group chat:
- From the Group Chats page, find the group chat you wish to disable.
- Right click the group chat and select Disable.
| Disabling a group chat removes all members and prevents new members from joining. |
| Any previously-archived chat history will be preserved for disabled group chats. |
Policies
Policies let you control various features of the Trillian client and Trillian Server. Manage cloud history settings, enable or disable third-party IM, enable or disable file transfers, etc. The default policy for your company has a few additional settings that impact all users of your domain, but you can create other policies and assign them to users individually.
Domain Policies
Domain settings impact all users of a domain, even if they're individually bound to another policy.
- Store group chat history on server: If enabled, group chat history is saved to the server.
- Allow server-to-server federeation: If enabled, your server can communicate with other Trillian Servers and other XMPP-capable servers, such as Cisco Jabber and Microsoft Lync.
Client Policies
- Force clients to send a disclaimer: If enabled, Trillian clients will automatically send the provided disclaimer text to remote parties once per hour or once per day.
- Allow clients to add users to their contact list: If enabled, Trillian clients will be allowed to manually add other Trillian users to their contact list.
- Allow clients to change their display name: If enabled, Trillian clients will be allowed to change the display name that other users see.
- Allow voice calls: If enabled, clients that support voice calls can start and accept voice calls.
- Allow clients to customize contact list group layout individually: If enabled, Trillian clients will be allowed to change the way their contact list is grouped on an individual basis, possibly overriding the LDAP structure provided by the server.
- Allow clients to leverage third-party plugins: If enabled, clients that support plugins will see the plugin preferences screen.
- Allow clients to change user interface skin: If enabled, clients that support user interface skins will see the skins preferences screen.
- Allow clients to configure when Trillian sets itself away and/or idle: If enabled, the away/status preferences screen is visible to users if their platform exposes one.
Chat History Policies
Choose whether or not Trillian Server archives chat history. You can also control whether or not Trillian desktop clients archive chat history locally.
File Transfers Policies
There are two ways that Trillian clients can send files and images:
- Peer-to-peer: Both sides of a transfer attempt to connect directly to send file and image data. If a direct connection cannot occur, the transfer fails. This option allows for much faster file transfers at the cost of not being able to track and store the files and images your users send. Mobile clients do not support this option; if you elect to use it, they will be unable to send files or images.
- Server-monitored: All media is first uploaded to the server before being sent to another client. This option allows the server to store a copy of all files and images sent by your users, and also provides greater resiliency in the face of firewalls and complex NAT configuration that make direct connection difficult.
Group Chat Policies
- Allow clients to create new group chats: If enabled, your users can start group chats on the Trillian network on their own.
- Allow clients to join existing group chats: If enabled, your users are allowed to browse through any open public group chats and join them.
Mail Policies
- Allow clients to leverage POP3/IMAP/native mail checking: If enabled, mail checking is enabled both through third-party IM plugins and a generic IMAP/POP3 interface.
Third-Party IM Policies
Enable or disable each third-party IM service supported by Trillian, such as AIM and Yahoo.
Text Insertion Policies
Text insertion lets you configure short snippets of text that are exposed in Trillian message windows for easy access by your users. For example, if you employ a group of traders who are regularly copying and pasting the same disclaimer to customers you can configure it as a text snippet here. The snippet will then appear visually and can be selected with the mouse or typed by hand using its assigned short code.
Custom Emoji Policies
The graphical equivalent of text insertion, custom emoji allow you to assign your own graphics to short codes of your choice. All Trillian clients will then be able to select and send these emoji in addition to the standard emoji set provided by Trillian. Along with text insertion, custom emoji are defined inside of policies to allow you to expose different text insertion and/or emojis to different users if you so choose.
Adding Policies
From the Policies page, click Add Policy... to add a policy.
Modifying Policies
To modify a policy:
- From the Policies page, find the policy you wish to modify.
- Double click the policy.
- From the Policy Details view, make any necessary changes.
- Click Close.
Deleting Policies
A policy can only be deleted if it is not currently in use. To delete a policy:
- From the Policy page, find the policy you wish to delete.
- Right click the policy and select Delete.
Upgrades
The most important thing to do before attempting a Trillian Server upgrade is to ensure you have an up-to-date backup of your existing deployment available in a safe place. This way, even if something goes catastrophically wrong, the server can be rolled back to the previous version in a consistent state. We therefore recommend you follow these steps before you begin:
- Stop the Trillian Server service.
- Close any open copy of Trillian Server Manager.
- Take a complete snapshot of your server data by copying the full data directory to the desktop.
You should now be in a position where you have the new installer on hand, the legacy installer available in case of an emergency, and the entire data directory of your server backed up should you need to restore it. It's time to upgrade! To upgrade Trillian Server, simply launch the installer and let it do its job. If the service is already running, the installer will shut it down before performing an upgrade. Your existing database will remain intact, the service will be restarted, and clients should be able to connect again immediately following the upgrade.
| The default location for Trillian Server's data directory is "C:\ProgramData\Trillian Server\". |
Backups
On-Site Backups
Trillian Server automatically performs daily backups of its internal database. Backups are stored according to a day-of-the-week grandfathering system ("Mon", "Tue", "Wed", etc) and are subsequently overwritten every 7 days.
| The default location for Trillian Server's automatic backups is "C:\ProgramData\Trillian Server\config\plugins\sqlite\db\backups". |
| In addition to on-site backups of your databases, we recommend you make a backup of your trillianserver.conf file. This file contains important information relating to your Trillian Server installation that cannot be otherwise recovered, and is also not a part of the standard on-site backup! |
Off-Site Backups
When using Amazon S3 storage, Trillian Server automatically sends encrypted backups to S3 once per week. When using local storage, no off-site backups are performed by Trillian Server. You should use the backup strategy of your choice to copy your on-site backups to an off-site location.